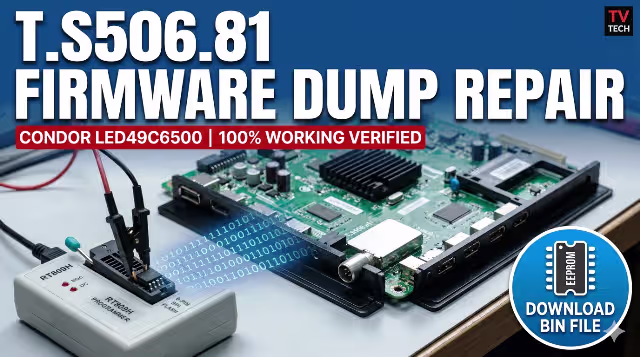
T.S506.81 Firmware Overview
The T.S506.81 is a universal LED TV main board widely used in budget and mid-range television sets, including the CONDOR LED49C6500. This board handles all primary functions including signal processing, panel timing, audio output, and memory management through its onboard 25Q32B SPI flash IC.
When the SPI memory becomes corrupted due to power surges, failed software updates, or natural degradation, the TV can exhibit a range of critical failures from boot loops to complete dead-set conditions. This article provides a tested and verified firmware dump that restores full functionality to the CONDOR LED49C6500 when programmed via the RT809H universal programmer.
This firmware dump is a raw binary image extracted directly from a fully operational unit. It includes bootloader data, system configuration, channel memory structure, and panel timing parameters calibrated specifically for the C490F15-E2-L panel.
Technical Specifications
| Brand | CONDOR |
|---|---|
| Model | LED49C6500 |
| Main Board | T.S506.81 |
| Panel | C490F15-E2-L |
| SPI Flash IC | 25Q32B (32Mbit / 4MB) |
| Programmer Method | RT809H Universal Programmer |
| Firmware Status | Tested 100% Working |
| File Type | Binary Dump (.bin) |
| Last Updated | June 03, 2026 |
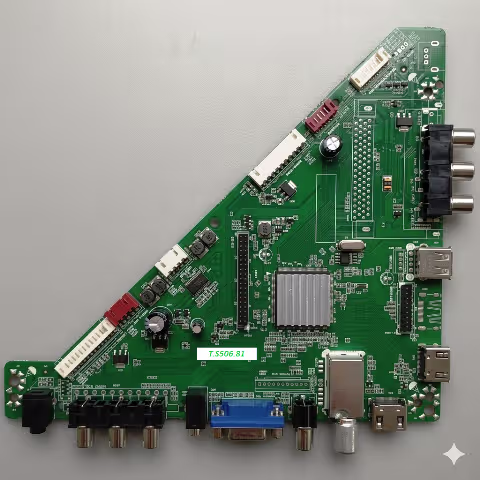
SPI Flash IC Location
The 25Q32B SPI flash memory chip is located on the T.S506.81 main board near the main processor. Identify it by the 8-pin SOIC package marked with “25Q32” on the chip surface. The image below shows the exact position for safe removal or in-circuit programming.
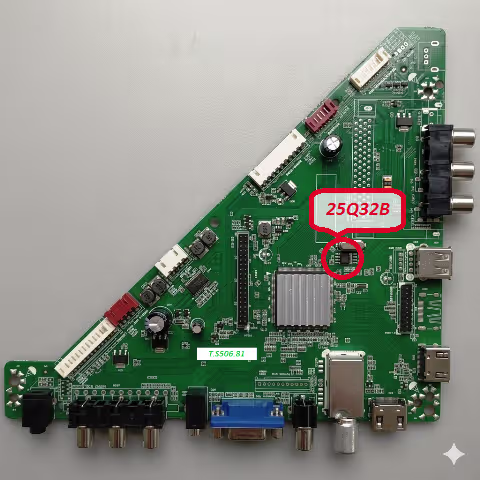
25Q32B SPI flash memory location on T.S506.81 main board
Common Issues with CONDOR LED49C6500
The following symptoms indicate SPI memory corruption on the T.S506.81 board and can be resolved with this firmware dump:
Boot Loop / Restart Cycle
TV powers on, shows logo briefly, then restarts continuously without reaching the home screen or input selection.
Stuck on Logo Screen
CONDOR logo appears on screen and freezes indefinitely. System fails to initialize beyond the bootloader stage.
Backlight On, No Display
LED backlight activates normally but the screen remains completely black. No OSD menu, no signal detection.
Dead Set After Power Surge
TV becomes completely unresponsive following an electrical surge. Standby LED may blink or remain off entirely.
No Sound Output
Video displays correctly but audio output is completely absent on all sources and volume levels.
Channel Memory Failure
Stored channels disappear after each power cycle. Auto-scan completes but results are not saved to memory.
OSD Menu Corruption
On-screen display shows garbled text, missing menu items, or incorrect language settings that cannot be changed.
Panel Timing Mismatch
Horizontal or vertical lines appear on screen. Image may be shifted, duplicated, or display incorrect resolution.
Diagnostic and Repair Protocol
Pre-Repair Diagnostics
Before proceeding with the firmware programming, complete these diagnostic steps to confirm the issue originates from corrupted SPI memory rather than hardware failure:
- Verify the power supply board outputs correct voltages: 5V standby, 12V main, and 24V backlight supply.
- Check the backlight LED strips for continuity using a LED tester or multimeter.
- Inspect the T.S506.81 main board for visually damaged components: swollen capacitors, burnt resistors, or cracked solder joints.
- Test the LVDS cable connection between the main board and panel for secure contact.
- Attempt a factory reset via the remote control service menu (if accessible) before resorting to SPI reprogramming.
Firmware Programming Procedure
Power Down and Disconnect
Completely disconnect the TV from mains power. Remove the back panel screws and carefully detach the rear cover to access the main board. Discharge any residual capacitor voltage by waiting at least 60 seconds.
Locate the 25Q32B SPI Flash
Identify the 25Q32B chip on the T.S506.81 board. Note pin 1 orientation marked by a dot on the IC. For in-circuit programming, disconnect the LVDS cable and all peripheral connectors from the main board.
Connect RT809H Programmer
Attach the SOP8 clip or socket adapter to the 25Q32B chip. Connect to the RT809H programmer via USB. Ensure the clip makes firm contact on all 8 pins. Verify chip detection in the RT809H software interface.
Backup Original Firmware
Before writing new data, read the existing contents and save as a backup file. This allows restoration if the new dump does not resolve the issue or if a different panel configuration is required.
Erase and Write New Dump
Perform a full chip erase operation first. Then load the downloaded T.S506.81 firmware dump file and execute the write operation. Wait for the process to complete without interruption.
Verify and Disconnect
Run the verify function to compare written data against the source file. Confirm 100% match. Remove the SOP8 clip carefully, reconnect all cables, and reassemble the TV for power-on testing.
Power-On Test
Connect the TV to mains power and observe the startup sequence. The CONDOR logo should appear followed by normal system initialization. Perform a factory reset from the settings menu and run channel auto-scan to complete the repair.
Video Repair Guide
Watch the complete step-by-step process for dumping and programming the T.S506.81 firmware using the RT809H programmer:
Download Firmware Dump
T.S506.81 • CONDOR LED49C6500 • SPI 25Q32B • 4MB Binary
FOR TECHNICIAN USE ONLY — Professional equipment required
Additional Technical Notes
- The 25Q32B operates at 3.3V logic level. Never apply 5V to the chip during programming.
- If in-circuit programming fails, desolder the SPI chip using a hot air rework station at 320 degrees Celsius with appropriate flux.
- For boards with a different SPI flash capacity (e.g., 25Q64), the dump file size must match the target chip. Do not pad or truncate the binary.
- After successful programming, the first boot may take 30 to 45 seconds longer than normal as the system reinitializes all parameters.
- If the TV displays “No Signal” after repair, access the service menu and verify the panel configuration matches C490F15-E2-L specifications.
Related Firmware Downloads
Explore more firmware dumps for similar main boards and CONDOR TV models:
Share This Firmware
Help fellow technicians find this resource