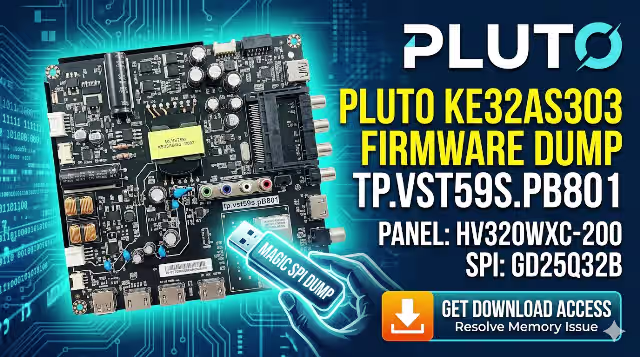
 Firmware Dump
Tested 100%
Firmware Dump
Tested 100%
TP.VST59S.PB813 Firmware Dump – Hisense LEDN32D36 SPI 25Q32 Download
Download the TP.VST59S.PB813 firmware dump specifically extracted for the Hisense LEDN32D36 television. This SPI 25Q32 memory dump resolves critical boot failures, display malfunctions, and corrupted firmware issues. The file has been tested and verified 100% working using the RT809H universal programmer with the matching JHD315GH-E3FMPW1 panel configuration.
Firmware Specifications
| Brand | Hisense |
|---|---|
| TV Model | LEDN32D36 |
| Main Board | TP.VST59S.PB813 |
| Panel | JHD315GH-E3FMPW1 |
| SPI Memory | 25Q32 (32Mbit / 4MB) |
| Programmer | RT809H Universal Programmer |
| File Type | Full SPI Dump (.bin) |
| Status | Tested 100% Working |
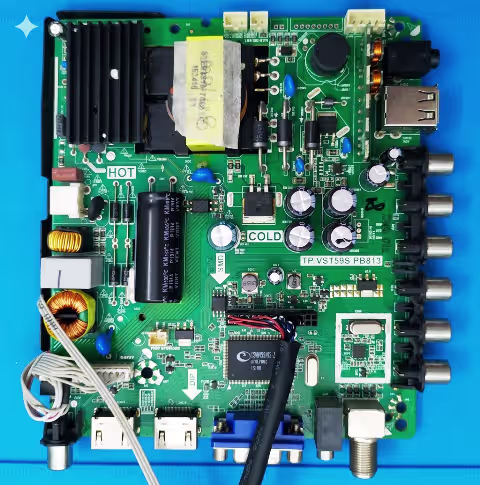
Main Board Identification
Verify your main board matches the TP.VST59S.PB813 revision shown below before proceeding with the firmware flash. Click the image to zoom for detailed component inspection.
TP.VST59S.PB813 Main Board – Click to zoom in new tab
SPI 25Q32 Memory Location
Locate the 25Q32 SPI flash memory chip on the TP.VST59S.PB813 board as highlighted below. This is the target chip for desoldering and programming with the RT809H.
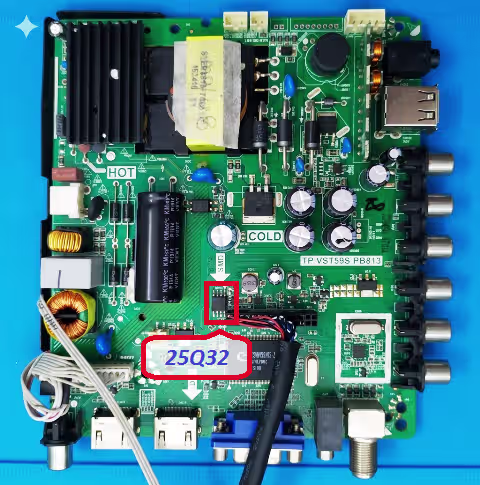
SPI 25Q32 Memory Chip Location – Click to zoom in new tab
Known Issues Resolved by This Firmware
The following symptoms on the Hisense LEDN32D36 with TP.VST59S.PB813 board indicate corrupted or failed SPI memory requiring a fresh dump flash:
- TV stuck on standby, power LED blinks but no startup
- Boot loop with Hisense logo repeating continuously
- Backlight turns on but no image or OSD menu displayed
- Frozen on logo screen and unresponsive to remote commands
- HDMI, AV, and USB input ports not detected or non-functional
- Audio output absent on all sources including internal speakers
- Remote control IR receiver completely unresponsive
- Channel auto-scan failure or tuner not initializing
- Random shutdown or restart during normal operation
- Corrupted OSD graphics, garbled menu text, or missing language options
- Software update failure resulting in bricked main board
- EEPROM data corruption causing factory reset loop
Diagnostic and Repair Protocol
Follow this systematic procedure to diagnose and repair the Hisense LEDN32D36 using the TP.VST59S.PB813 firmware dump:
- Visual Inspection: Examine the TP.VST59S.PB813 board for burnt components, swollen capacitors, or cold solder joints around the power regulation and SPI memory area.
- Voltage Verification: Confirm 3.3V supply at the SPI 25Q32 chip VCC pin and 5V/12V rails on the main board power section before suspecting firmware corruption.
- Desolder SPI Chip: Using a hot air rework station set to 350 degrees Celsius with medium airflow, carefully desolder the 25Q32 SPI chip. Apply flux generously to prevent pad damage.
- Read Existing Dump: Place the chip in the RT809H programmer using an SOP8 socket adapter. Read and save the existing dump as a backup before erasing.
- Erase Memory: Perform a full chip erase using the RT809H software. Verify the chip is completely blank by running a blank check operation.
- Write New Firmware: Load the downloaded TP.VST59S.PB813 firmware dump file. Write it to the 25Q32 chip and wait for the automatic verification pass to confirm successful programming.
- Resolder and Test: Resolder the programmed SPI chip back onto the board. Reconnect the panel flex cable and power supply, then power on the TV to verify successful boot and full functionality.
- Post-Flash Calibration: After successful boot, perform a factory reset from the service menu, run channel auto-scan, and verify all inputs (HDMI, AV, USB, Tuner) are operational.
Video Tutorial
Watch the complete firmware dump and flashing procedure for the TP.VST59S.PB813 main board. This tutorial covers chip removal, RT809H programming, and post-flash verification.
Download TP.VST59S.PB813 SPI Dump File
SPI 25Q32 Full Dump | Hisense LEDN32D36 | Panel: JHD315GH-E3FMPW1 | Verified Working
Click Step 1 first, then Step 2 will appear for the actual download link.