 TECHNICIAN ONLY
TESTED 100%
TECHNICIAN ONLY
TESTED 100%
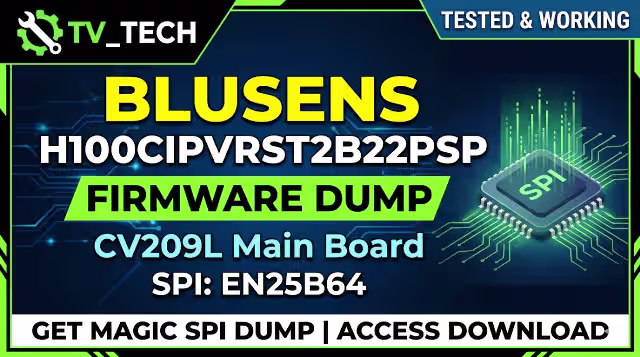
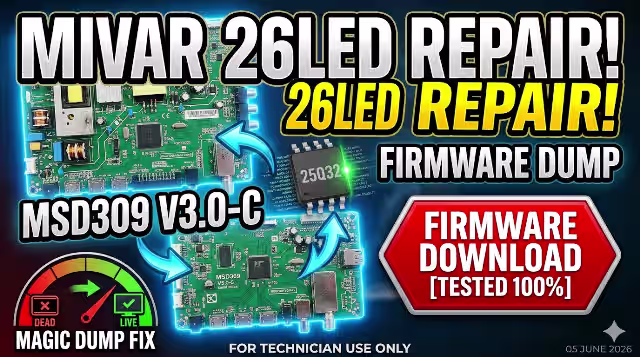
Msd309 V3.0-C Firmware Dump for Mivar 26LED TV — SPI 25Q32 Download
Overview
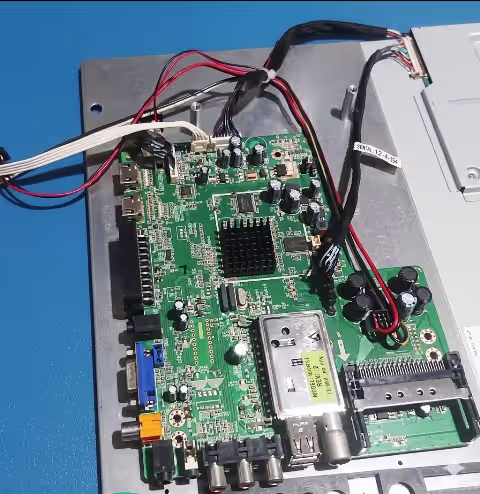
This professional firmware dump provides a complete SPI flash solution for the Mivar 26LED television equipped with the Msd309 V3.0-C main board. The dump targets the 25Q32 (32Mbit) SPI memory chip and is designed to be programmed using the RT809H universal programmer. This file has been extracted from a fully operational unit, verified, and tested to be 100% working.
Hardware Specifications
| Brand | Mivar |
|---|---|
| Model | 26LED |
| Main Board | Msd309 V3.0-C |
| Panel | LTA260AP10 |
| SPI Flash IC | 25Q32 (32Mbit / 4MB) |
| Programmer | RT809H |
| Firmware Status | Tested 100% Working |

Common Issues Resolved by This Firmware
The following symptoms on the Mivar 26LED with Msd309 V3.0-C board are typically caused by corrupted SPI memory data and are resolved by flashing this dump:
- Stuck on Logo / Boot Loop: TV powers on, displays the manufacturer logo, but never reaches the home screen or input source
- No Boot / Dead After Standby: Power LED illuminates but the TV fails to initialize; no display output whatsoever
- Black Screen with Backlight On: Backlight is active but no OSD, no picture, and no response to remote control commands
- Corrupted OSD Menu: On-screen display shows garbled text, missing menu items, or incorrect language settings that cannot be changed
- No Signal on All Inputs: TV boots normally but reports “No Signal” on every input source (HDMI, AV, USB, TV tuner)
- Audio Present Without Video: Sound output is functional but the screen remains black or shows distorted lines
- Automatic Restart / Random Shutdown: TV reboots by itself intermittently or shuts down after a few seconds of operation
- EEPROM / Channel Data Corruption: Saved channels disappear, settings reset to factory defaults on every power cycle
- Software Update Failure Recovery: Previous firmware update was interrupted causing the main board to become unresponsive
Diagnostic & Repair Protocol
Pre-Flash Diagnostics
- Visual Inspection: Examine the Msd309 V3.0-C main board for burnt components, swollen capacitors, cracked solder joints, or physical damage to the 25Q32 SPI chip. Address any hardware issues before attempting a firmware flash.
- Power Supply Verification: Measure all voltage rails supplying the main board (3.3V, 5V, 12V). Confirm stable output with no ripple exceeding 50mV. A faulty power supply can cause symptoms that mimic firmware corruption.
- SPI Chip Identification: Locate the 25Q32 SPI flash memory on the Msd309 V3.0-C board. Verify the chip marking matches “25Q32” (Winbond W25Q32 or equivalent). Note the chip orientation for correct clip or socket placement.
- Backup Original Firmware: Before writing the new dump, always read and save the existing SPI content using the RT809H. This provides a recovery point if needed and helps with future diagnostics.
Flashing Procedure with RT809H
- Connect SPI Chip: Desolder the 25Q32 from the Msd309 V3.0-C board or use an SOP8 test clip for in-circuit programming. Ensure clean, firm contact on all 8 pins. Remove the board from mains power before connecting.
- Configure RT809H Software: Open the RT809H programmer application. Select the chip model: W25Q32 (or 25Q32FV/BV). Verify the SPI interface settings match the chip specifications (SPI mode, 3.3V VCC).
- Erase the Chip: Perform a full chip erase to clear all existing corrupted data. Wait for the erase verification to complete successfully before proceeding.
- Load and Write Firmware: Open the downloaded SPI dump file. Write the firmware to the 25Q32 chip. The process typically takes 30 to 60 seconds for a 4MB file.
- Verify the Flash: After writing, perform a read-back and verify operation. The RT809H software should report a 100% match between the written data and the source file. If verification fails, check connections and retry.
- Reassemble and Test: Resolder or disconnect the programming clip. Reinstall the main board in the Mivar 26LED chassis. Connect the LTA260AP10 panel LVDS cable, speaker, and power supply. Power on and verify normal boot, OSD access, and all input sources.
Video Guide
Watch the complete step-by-step firmware dump and repair process for the Msd309 V3.0-C main board:
Post-Flash Verification Checklist
- Boot Sequence: TV powers on and reaches home screen or last input source within 8 to 15 seconds
- OSD Menu: Full access to all menu options; language, picture, sound, channel, and system settings are functional
- All Inputs Operational: HDMI, AV, component, USB, and TV tuner inputs detect and display signals correctly
- Panel Display Quality: No dead lines, color inversion, flickering, or resolution mismatch on the LTA260AP10 panel
- Audio Output: Internal speakers and audio output jacks produce clear sound with volume control responsive
- Channel Scan: Auto-scan detects and stores TV channels; channel data persists after power cycle
- Remote Control: All remote control buttons respond correctly including power, input select, volume, and channel
- Standby and Wake: TV enters standby mode cleanly and wakes up without boot issues
Download Firmware Dump
File: Msd309 V3.0-C SPI Dump • IC: 25Q32 (4MB) • Format: BIN
Programmer: RT809H • Status: Tested 100% Working
Frequently Asked Questions
What issues does the Msd309 V3.0-C firmware dump fix on Mivar 26LED?
This firmware dump resolves stuck on logo, no boot, black screen with backlight, corrupted OSD menu, no signal on all inputs, audio with no video, automatic restarts, and EEPROM data corruption issues caused by corrupted SPI flash memory.
Which programmer is required to flash SPI 25Q32 on Msd309 V3.0-C?
The RT809H universal programmer is required to read and write the SPI 25Q32 flash memory chip on the Msd309 V3.0-C main board. An SOP8 test clip or desoldering station is also recommended for chip access.
Is this Msd309 V3.0-C firmware tested and working?
Yes, this firmware dump has been tested 100% working on the Mivar 26LED TV with LTA260AP10 panel and SPI 25Q32 memory chip. All inputs, OSD menus, and display functions have been verified.
Can I use this firmware with a different panel?
No. This dump is configured specifically for the LTA260AP10 panel. Using it with a different panel model will likely cause display malfunctions. Always verify your panel model before flashing.