

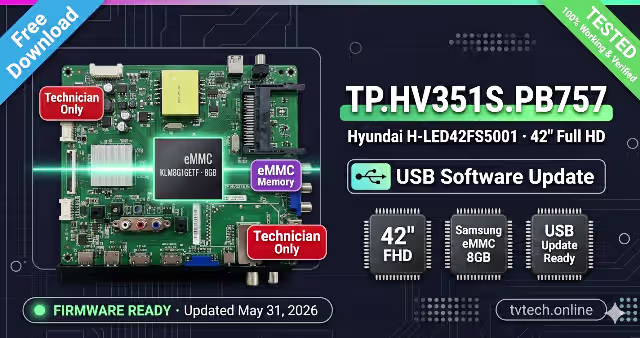
TP.HV351S.PB757 USB Software Update for Hyundai H-LED42FS5001
Overview
TP.HV351S.PB757 USB software update for Hyundai H-LED42FS5001 is a complete firmware package that improves the performance and stability of your TV. It includes bug fixes, security patches, and system optimizations. This mainboard uses an eMMC KLM8G1GETF (Samsung 8GB embedded memory) — it does not have a standard SPI flash chip. The software must be installed via USB update method.
This software has been tested 100% working and is ready for direct USB installation. To update your TV’s software, download the update file from the link below, copy it to a FAT32 formatted USB drive, and follow the step-by-step instructions. The update process takes a few minutes to complete. Once finished, your TV will restart automatically with improved performance and all issues resolved.
eMMC Memory Information — KLM8G1GETF
Samsung KLM8G1GETF — Onboard eMMC Memory
This mainboard stores all firmware, operating system, and configuration data inside a Samsung KLM8G1GETF eMMC 8GB embedded memory chip soldered directly to the PCB. Unlike boards with removable SPI flash ICs, this board requires the USB update method for software installation.
- Manufacturer: Samsung Semiconductor
- Part Number: KLM8G1GETF-B041
- Type: eMMC 5.1 Embedded Flash
- Capacity: 8GB (64Gbit)
- Package: 153-ball FBGA
- Interface: eMMC 5.1 (HS400)
- Update Method: USB software update (no SPI programmer needed)
Software Specifications
| Mainboard Model | TP.HV351S.PB757 |
|---|---|
| TV Model | Hyundai H-LED42FS5001 |
| Screen Size | 42″ Full HD LED |
| Resolution | 1920 × 1080 (Full HD) |
| Memory Type | eMMC KLM8G1GETF 8GB |
| Memory Manufacturer | Samsung Semiconductor |
| SPI Flash | None — eMMC only |
| Software Type | USB Software Update Package |
| Installation Method | USB Flash Drive (FAT32) |
| File Contents | System image + bootloader + configuration |
| USB Drive Requirement | FAT32, max 8GB recommended |
| Status | Verified & Working |
| Last Updated | May 31, 2026 |
Known Issues — Hyundai H-LED42FS5001
The following common faults are reported on the Hyundai H-LED42FS5001 with the TP.HV351S.PB757 mainboard and eMMC KLM8G1GETF memory. This USB software update resolves all software-related problems listed below.
- TV stuck on Hyundai logo — boot loop, never reaches home screen
- Dead TV after failed OTA or USB software update (bricked eMMC)
- No picture with sound only — black screen while backlight stays ON
- Smart TV apps crashing, freezing, or failing to load on startup
- Wi-Fi module not detected — wireless settings grayed out or missing
- Wi-Fi connected but no internet — DNS or network stack corruption
- HDMI ports showing “No Signal” with all external devices
- Audio output distortion — crackling, popping, or complete silence from speakers
- Remote control unresponsive — delayed or missed key presses via IR
- Factory reset loop — TV resets itself continuously after every power cycle
- eMMC data corruption causing channel database loss and scan failure
- Backlight flickers intermittently then powers off after a few seconds
- OSD menu language stuck in wrong language or garbled text display
- Netflix, YouTube, or other streaming apps fail to authenticate or crash
- USB playback not working — TV cannot detect or read USB storage devices
- System extremely slow — long boot time and lagging menu navigation
Diagnostic & Repair Protocol
Follow this systematic protocol to diagnose and repair the Hyundai H-LED42FS5001 using the TP.HV351S.PB757 USB software update. This guide is intended for qualified TV repair technicians only.
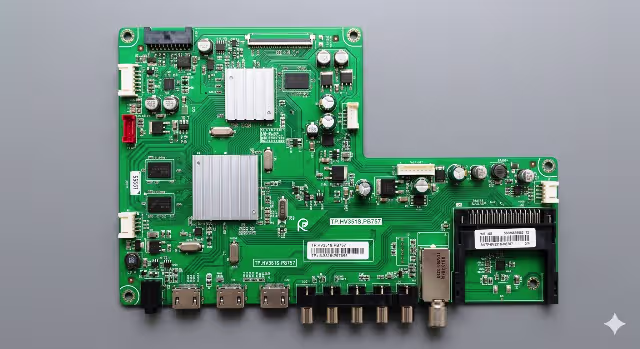
- Visual Inspection: Examine the TP.HV351S.PB757 mainboard for burned components, swollen capacitors, cracked solder joints, and corroded connectors. Inspect the eMMC KLM8G1GETF chip for physical damage or lifted pads.
- Power Supply Verification: Measure standby voltage (5V STB) and main supply rails (12V, 3.3V, 1.8V). Confirm all voltages are within ±5% tolerance. Check the 1.8V and 3.3V rails specifically — these power the eMMC and SoC directly.
- eMMC Health Check: If the TV partially boots, access the service menu to check eMMC read/write status. Bad blocks or excessive write cycles on the KLM8G1GETF can cause intermittent boot failures.
- Backlight Diagnosis: If the TV powers on with sound but no picture, test LED backlight strips with an LED/LCD tester. Check the backlight driver IC, MOSFETs, and LED string continuity on the power board.
- USB Drive Preparation: Format a USB flash drive (max 8GB) to FAT32 with 4096 allocation size. Use a high-quality USB 2.0 drive for maximum compatibility with the TP.HV351S.PB757 USB port.
- Software File Transfer: Download the software update package. Extract all files and copy them to the root directory of the FAT32 USB drive. Do not rename any files or place them inside folders.
- USB Software Installation: Power off the TV completely and unplug from mains for 30 seconds. Insert the USB drive into the TV USB port. Reconnect power and turn on the TV. The update will auto-detect and begin writing to the eMMC KLM8G1GETF memory.
- Monitoring the Update: A progress bar or percentage indicator will appear on screen. Do NOT power off or remove the USB drive during this process. The entire write to eMMC typically takes 3–8 minutes depending on file size.
- Post-Update Verification: After the TV restarts, verify: boot sequence completes fully, OSD menus display correctly, all HDMI and USB ports function, Wi-Fi connects and browses, audio outputs work on all modes, and the IR remote is responsive.
- Factory Reset (if needed): If issues persist after the update, perform a factory reset from Settings → System → Factory Reset. This clears all residual corrupt data from the eMMC user partition without affecting the newly installed firmware.
- Channel Scan & Calibration: Run auto channel scan for DVB-T/T2/C. Adjust picture settings (brightness, contrast, backlight level, sharpness). Test all smart TV apps including Netflix, YouTube, and the built-in browser.
- eMMC ISP Recovery (Last Resort): If the TV is completely dead and does not respond to USB update, use an eMMC ISP adapter (UFI Box, Easy JTAG, or RT809H with eMMC socket) to connect directly to the KLM8G1GETF via ISP pads on the mainboard. Write the full eMMC image to restore the TV.
USB Software Update Instructions
- Download the software update file using the download button below.
- Extract the archive contents. You should see the update files (do not rename them).
- Format a USB flash drive to FAT32 (max 8GB recommended, USB 2.0 preferred).
- Copy all extracted files to the root directory of the USB drive. Do not place files inside any folder.
- Power off the TV and unplug from the wall outlet for at least 30 seconds.
- Insert the USB drive into the USB port on the Hyundai H-LED42FS5001.
- Reconnect power and press the Power button to turn on the TV.
- The TV will auto-detect the USB update files and begin writing to the eMMC KLM8G1GETF memory. A progress indicator will appear on screen.
- Wait patiently — do NOT remove the USB drive or power off the TV during the update. This typically takes 3–8 minutes.
- The TV will restart automatically when the update is complete.
- Remove the USB drive after the TV has fully rebooted to the home screen.
- Perform a factory reset if recommended: Settings → System → Factory Reset.
Download TP.HV351S.PB757 USB Software Update
Hyundai H-LED42FS5001 · eMMC KLM8G1GETF · USB Update Package · Tested 100% Working
USB Software Update Package · FAT32 USB Required
Step 1: Click to proceed → Step 2: Click again to download the file


