

 ⚡ TECHNICIAN ONLY
SPI DUMP ✔ VERIFIED
⚡ TECHNICIAN ONLY
SPI DUMP ✔ VERIFIED
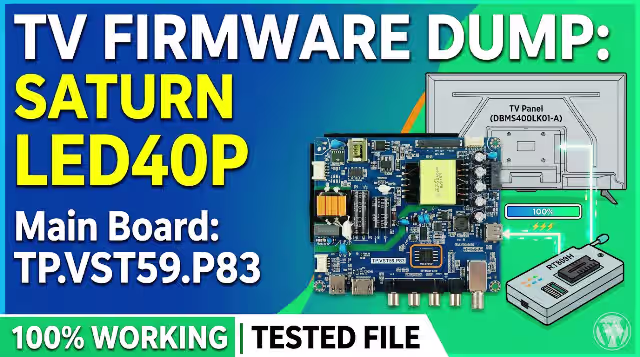
TP.VST59.P83 Firmware Dump for Saturn LED40P – W25Q32 SPI Flash Download
Download the TP.VST59.P83 firmware dump specifically configured for the Saturn LED40P television. This memory dump file targets the W25Q32 SPI flash chip and has been tested and verified 100% working. Designed exclusively for professional TV repair technicians to resolve critical memory-related failures.
📋 Firmware Specifications
| Parameter | Details |
|---|---|
| Brand | Saturn |
| Model | LED40P |
| Main Board | TP.VST59.P83 |
| LCD Panel | DBMS400LK01-A |
| SPI Flash IC | W25Q32 (32Mbit / 4MB) |
| Programmer Method | RT809H / USB Update |
| Firmware Status | ✅ Tested 100% Working |
| File Type | SPI Full Dump (.bin) |
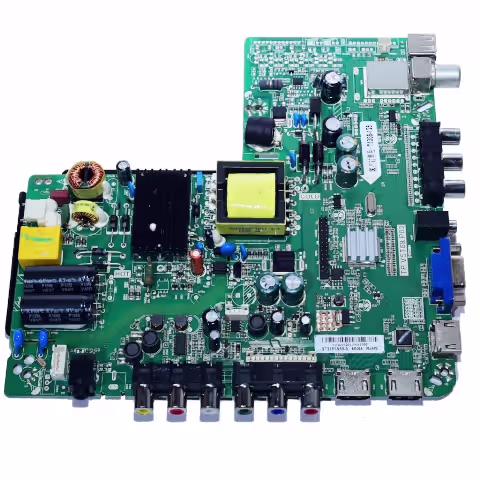
🔍 SPI Flash IC Location on Board
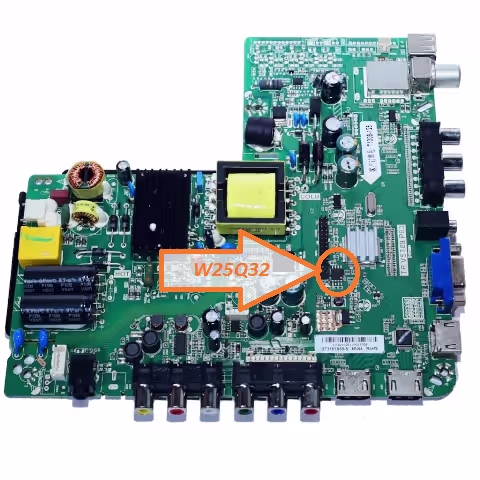
The W25Q32 SPI flash memory chip is located near the main processor on the TP.VST59.P83 board. Identify the 8-pin SOIC package marked 25Q32 before desoldering for external programming or use the on-board USB update port if available.
⚠ Common Issues – Saturn LED40P (TP.VST59.P83)
The following symptoms indicate corrupted or damaged SPI flash memory that this firmware dump resolves:
- Dead TV / No Power Response: Power LED does not illuminate, no standby light despite confirmed power supply output.
- Stuck on Boot Logo: TV powers on but freezes on the Saturn logo screen indefinitely, never reaching the home channel.
- Backlight On, No Display: Backlight activates but screen remains black with no OSD menu or picture output.
- No Sound or Distorted Audio: Audio output is completely absent or produces static/distorted sound across all inputs.
- HDMI / AV Input Not Detected: External source inputs (HDMI, AV, USB) are unresponsive or not recognized by the system.
- Remote Control Unresponsive: IR remote commands are not received despite functional remote and IR sensor hardware.
- Auto-Search / Channel Scan Failure: TV fails to detect or store broadcast channels during auto-tuning process.
- OSD Menu Corruption: On-screen display shows garbled text, missing options, or incorrect language defaults.
- Random Restart / Reboot Loop: TV continuously restarts or powers off unexpectedly during normal operation.
- EEPROM / SPI Data Corruption: Firmware checksum errors detected during diagnostic read, indicating flash memory degradation.
🔧 Diagnostic & Repair Protocol
Pre-Repair Diagnostics
- Visual Inspection: Examine the TP.VST59.P83 board for burnt components, swollen capacitors, cold solder joints, and physical damage to the W25Q32 IC.
- Power Supply Verification: Confirm all voltage rails (5V, 12V, 3.3V) from the PSU are within ±5% tolerance before suspecting firmware corruption.
- SPI Flash Read Test: Connect the RT809H programmer to the W25Q32 chip (in-circuit or desoldered) and perform a read operation. Verify the chip is detected and readable.
- Backup Original Dump: Always save the original SPI flash content before writing new firmware. Store the backup file with the TV serial number for reference.
Firmware Flashing Procedure – RT809H Method
- Desolder the W25Q32 IC from the TP.VST59.P83 board using a hot air rework station at 350°C with flux applied to prevent pad damage.
- Seat the IC in the RT809H SOP8 socket adapter. Ensure correct orientation by aligning pin 1 (dot marker) with the socket indicator.
- Launch RT809H software, select chip model W25Q32 (Winbond), and click Read to verify the chip is properly detected and communicating.
- Click Erase to perform a full chip erase. Confirm the erase verification passes (all 0xFF) before proceeding to write.
- Load the downloaded firmware dump (.bin file) via Open File. Verify the file size matches 4,194,304 bytes (4MB) exactly.
- Click Program/Write to flash the firmware. Wait for the write and automatic verify process to complete with a PASS status.
- Resolder the W25Q32 IC back onto the TP.VST59.P83 board. Inspect all 8 pins under magnification for proper solder joints and no bridges.
- Reconnect all cables (LVDS, backlight, power supply, speaker) and power on the TV. Perform initial setup and channel scan to confirm full functionality.
USB Update Method (Alternative)
- Format a USB flash drive to FAT32 (maximum 8GB recommended for compatibility).
- Copy the firmware bin file to the root directory of the USB drive. Do not place inside any folder.
- Insert the USB drive into the service USB port on the TP.VST59.P83 board while the TV is powered off.
- Power on the TV. The update process should initiate automatically if the board supports USB recovery mode. A progress indicator may appear on screen.
- Wait until the process completes and the TV restarts automatically. Do not interrupt power during the update.
🎬 Video Guide – Firmware Flashing Tutorial
Watch the complete step-by-step procedure for reading, erasing, and programming the W25Q32 SPI flash on the TP.VST59.P83 main board using the RT809H programmer.
⬇ Download Firmware Dump
TP.VST59.P83 – Saturn LED40P
SPI Flash: W25Q32 | File: Full Dump (.bin) | Status: ✅ Verified Working
🛡 File scanned & verified clean. For professional technician use only.
Click Step 1 to unlock, then click Step 2 to download the firmware file.


