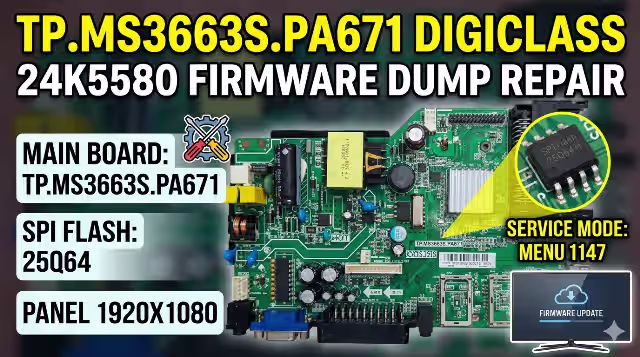
TP.MS3663S.PA671 Firmware Dump
Digiclass 24K5580 – Verified 100% Working
✓ RT809H Tested
✓ SPI 25Q64
✓ Full HD 1080p

TP.MS3663S.PA671 Main Board
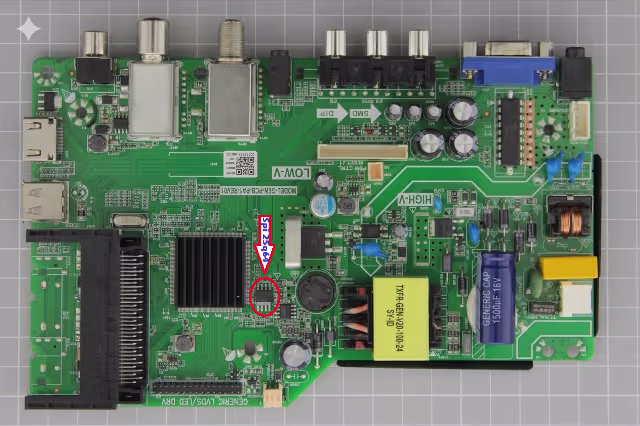
SPI Flash 25Q64 Location
Technical Specifications
| Main Board Model | TP.MS3663S.PA671 |
| TV Model | Digiclass 24K5580 |
| SPI Flash IC | 25Q64 (8MB) |
| Panel Resolution | 1920 x 1080 (Full HD) |
| Service Mode Access | MENU + 1147 |
| Panel Mirror Setting | ON/OFF (Adjustable) |
| Programmer Method | RT809H |
| Firmware Status | 100% TESTED & WORKING |
Common Issues for This Model
- 🔴 TV stuck on logo screen / boot loop issue
- 🔴 No display / blank screen with backlight working
- 🔴 Panel settings corrupted – incorrect mirroring
- 🔴 No power-on after firmware corruption
- 🔴 Software update failure causing brick
- 🔴 Main menu not accessible or frozen UI
- 🔴 Incorrect panel resolution causing distortion
- 🔴 EEPROM/Flash IC corruption from power surge
Diagnostic & Repair Protocol
- Initial Diagnosis: Check for power LED status, backlight operation, and any video signal output
- Board Identification: Verify main board model number TP.MS3663S.PA671 matches exactly
- SPI Flash Location: Locate 25Q64 IC on the board (refer to SPI image above)
- Backup Original: Always read and backup existing firmware before writing (if possible)
- Programmer Setup: Use RT809H programmer with proper adapter for 25Q64
- Chip Selection: Select “Winbond 25Q64” or compatible option in programmer software
- Flash Process: Erase chip completely, then write downloaded firmware dump
- Verification: Verify written data matches source file (checksum comparison)
- Service Mode: After successful boot, access service mode (MENU + 1147)
- Panel Configuration: Adjust mirror setting (ON/OFF) based on panel orientation
- Final Testing: Test all inputs, menu navigation, and picture quality
⚡ Important Notice: Ensure correct panel mirror setting after flashing. Incorrect configuration may result in reversed/inverted display. Access service mode using MENU + 1147 to adjust.
Video Tutorial – Firmware Flashing Guide
Download Firmware Dump
Click the button below to start the download process
Ready to Download
Please wait 10 seconds…
Download Process:
1️⃣ First click opens ad page (supports our site)
2️⃣ Second click redirects to download link
📦 File Format: .BIN | Size: 8MB | Programmer: RT809H Compatible