TP.MS3663S.PB801 Firmware Dump – Dreamax DM43DN100 | SPI 25Q64 Download
Firmware Overview
This page provides the verified SPI memory dump for the Dreamax DM43DN100 television equipped with the TP.MS3663S.PB801 main board. The firmware targets the 25Q64 (64Mbit) SPI flash chip and is intended exclusively for qualified television repair technicians who are experienced with hardware-level programming.
The dump was extracted and re-verified using the RT809H universal programmer. It has been tested on a live unit with the HV430FHB-N10 panel and confirmed 100% functional, restoring full operation from a corrupted memory state.
Device Specifications
| Brand | Dreamax |
|---|---|
| Model | DM43DN100 |
| Main Board | TP.MS3663S.PB801 |
| Panel | HV430FHB-N10 (43″ FHD) |
| SPI Flash | 25Q64 (64Mbit / 8MB) |
| Programmer | RT809H |
| Firmware Status | Verified & Working |
| File Type | BIN (Full Dump) |
| Last Updated | 09 June 2026 |
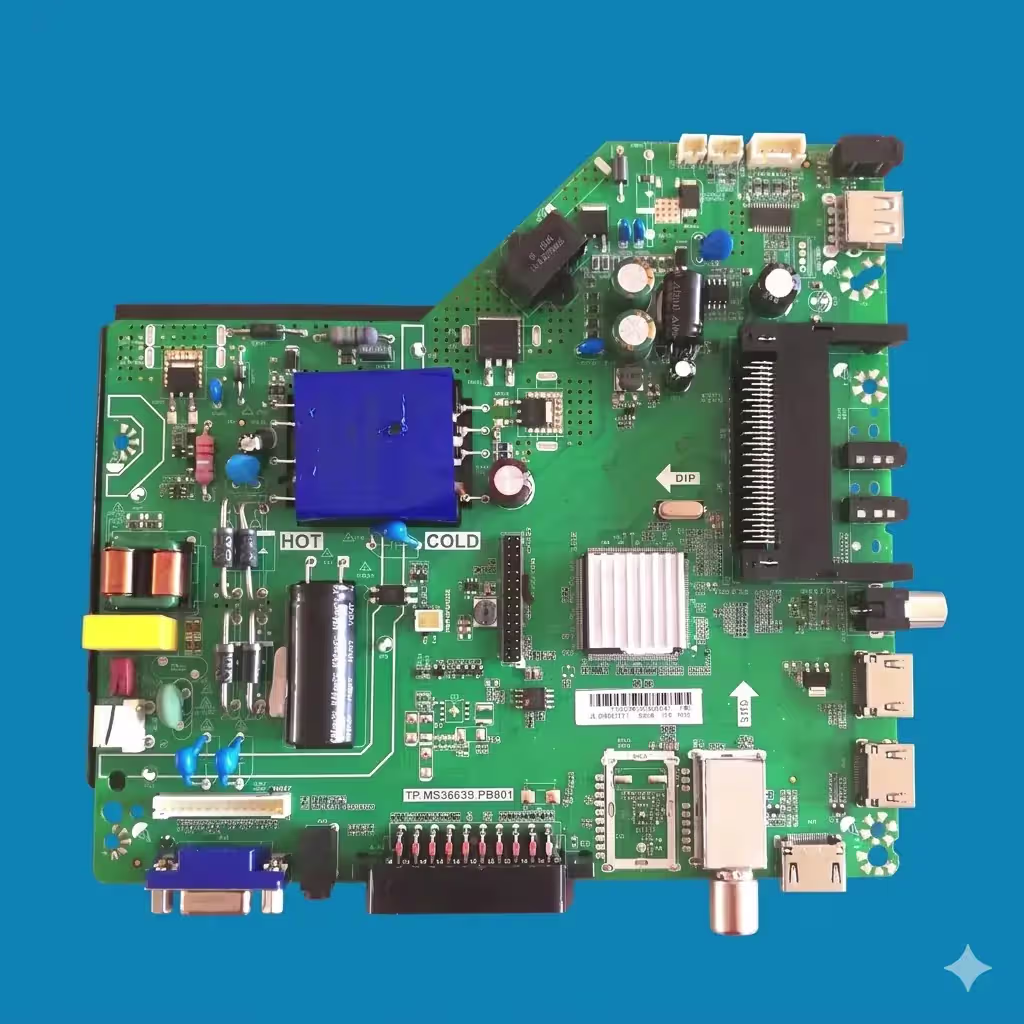
Main Board Reference
The image below shows the TP.MS3663S.PB801 main board layout. Click the image to open a full-resolution view for identifying component locations, SPI chip position, and connector pinouts.
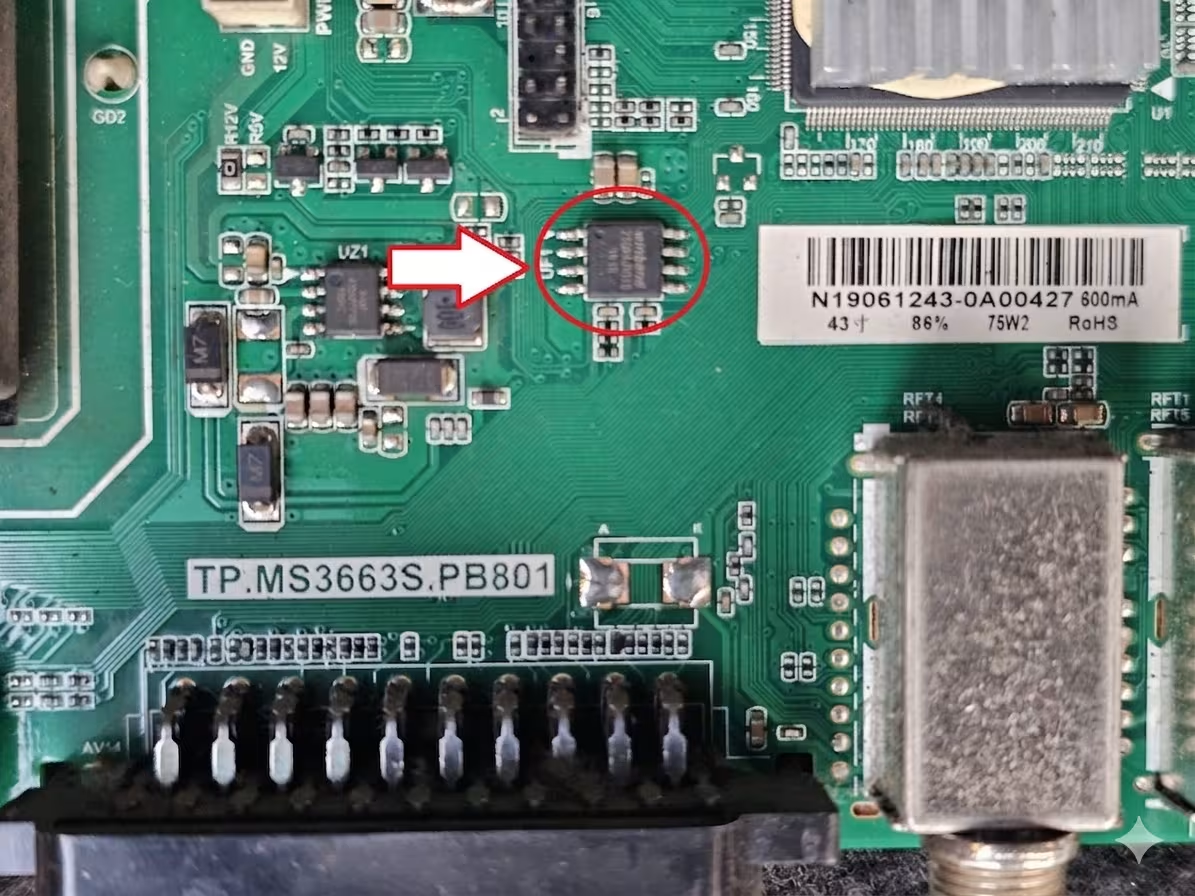
SPI Flash Chip Location
The 25Q64 SPI flash memory is located near the main processor on the TP.MS3663S.PB801 board. Refer to the image below for the exact chip position. Desolder or use an in-circuit clip (SOP8) when connecting to the RT809H programmer.
Known Issues – Dreamax DM43DN100
The following symptoms have been documented on the Dreamax DM43DN100 and are commonly resolved by reflashing the SPI memory with a verified dump:
TV shows no sign of life. Standby LED does not illuminate. Power supply is confirmed functional but main board fails to initialize due to corrupted boot sector in SPI memory.
Television powers on and displays the Dreamax logo but never progresses to the home screen. Unit continuously reboots in an endless cycle indicating firmware corruption.
Backlight turns on producing a bright screen with no image, no OSD, and no channel data. Audio may or may not be present. Caused by incomplete firmware or panel configuration mismatch in SPI data.
Sound output works correctly across all sources but the display remains black. TCON signals are not generated because the main firmware fails to load display parameters from corrupted memory.
OSD menu appears but freezes within seconds. Remote control commands are ignored. Buttons on the main board have no effect. Root cause is data corruption in the user settings and system configuration blocks.
All external input ports fail to recognize connected devices. Source menu shows inputs as unavailable. EDID and input routing data in the SPI memory are damaged.
Image appears with wrong colors, shifted lines, or pixel artifacts. Panel timing parameters stored in firmware do not match the HV430FHB-N10 panel specifications.
Diagnostic and Repair Protocol
Follow this standardized procedure to diagnose the fault and successfully flash the firmware dump to the Dreamax DM43DN100 main board.
Pre-Repair Diagnostics
Measure PSU voltages with a multimeter before suspecting firmware. Confirm 5V standby, 12V main, and 24V backlight rails are within tolerance. A faulty PSU can mimic firmware symptoms.
Examine the TP.MS3663S.PB801 for burned components, swollen capacitors, cracked solder joints, or corrosion near the SPI chip area. Address any hardware faults before flashing.
Before writing, always read the current SPI content using the RT809H. Save this backup. Compare the file size — it should be exactly 8,388,608 bytes (8MB) for the 25Q64 chip. A blank or partial read confirms memory corruption.
Firmware Flashing Procedure
Install the latest RT809H software. Select chip model W25Q64 (or equivalent 25Q64 variant). Connect the SOP8 clip or socket adapter to the programmer. Ensure the clip is firmly seated on the SPI chip with correct pin 1 orientation.
Perform a full chip erase before writing. Verify the erase by reading back — all bytes should be 0xFF. An incomplete erase will cause write verification failures.
Load the downloaded BIN file into RT809H software. Click Write/Program. Wait for the process to complete without interruption. Do not disconnect power or the clip during writing.
After writing, use the Verify function to compare the chip content against the source BIN file. A 100% match confirms successful programming. If verification fails, re-seat the clip and repeat from the erase step.
Disconnect the programmer. Reassemble the TV. Power on and verify normal boot sequence, channel tuning, HDMI input detection, OSD menu navigation, and audio output. Perform a factory reset from the service menu if the panel shows minor timing issues on first boot.
Video Tutorial
Watch the complete step-by-step repair walkthrough for the TP.MS3663S.PB801 firmware flashing process below:
Download Firmware Dump
Dreamax DM43DN100 – SPI 25Q64 Firmware Dump
File: TP.MS3663S.PB801_DM43DN100_25Q64.bin | Size: 8MB | Format: BIN
Board: TP.MS3663S.PB801 | Panel: HV430FHB-N10 | Chip: 25Q64
Step 1: Click the button above to proceed. Step 2: The direct download link will appear.
Important Technical Notes
- This firmware dump is configured exclusively for the HV430FHB-N10 panel. Using it with a different panel model will result in display malfunction or no image output.
- Always desolder the SPI chip or disconnect the board from the power supply when using an in-circuit programming clip to avoid backfeeding voltage to the programmer.
- If the TV displays an image but with incorrect resolution or color, access the factory service menu and recalibrate the panel settings or reload panel timing parameters.
- Verify the SPI chip model markings under magnification before programming. Writing a 64Mbit dump to a mismatched chip (such as 25Q32) will fail or produce unpredictable behavior.
- This firmware file is provided for professional technician use only. Incorrect flashing can permanently damage the main board.
Related Firmware Dumps
If you are working with similar main boards or panel configurations, the following resources may also be helpful: