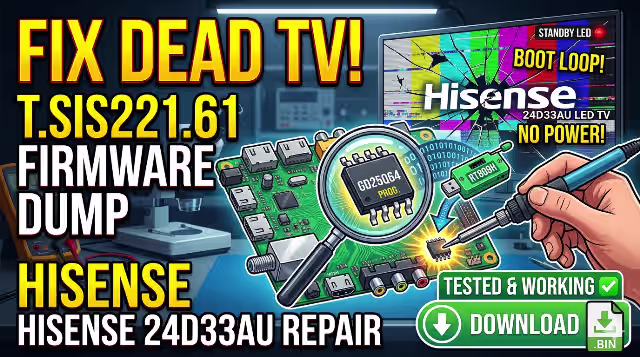
T.SIS221.61 Firmware Dump Download – HISENSE 24D33AU LED TV Flash Repair
This page provides a tested and 100% working firmware dump for the T.SIS221.61 motherboard used in the HISENSE 24D33AU LED TV. This flash dump resolves critical boot failures including no power on, no backlight, blinking standby indicator, and other memory-related startup issues.
📋 Hardware & Firmware Specifications
| TV Model | HISENSE 24D33AU |
|---|---|
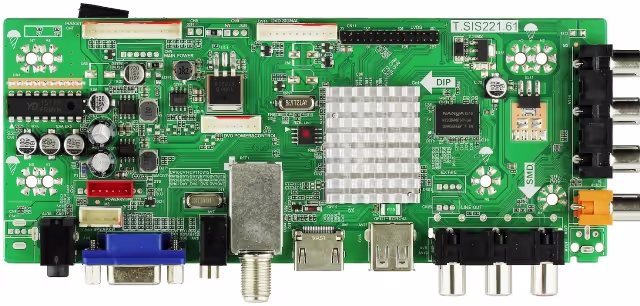
| Main Board | T.SIS221.61 |
| Panel | V236BJ1-LE2 |
| SPI Flash IC | GD25Q64 (GigaDevice 25Q64 – 64Mbit / 8MB) |
| Package Type | SOP8 |
| Programmer | RT809H Universal Programmer |
| Flash Method | Desolder → Program → Resolder |
| Firmware Status | ✅ Tested – 100% Working |
| File Type | Binary Flash Dump (.bin) |
| Compatibility | T.SIS221.61 board with V236BJ1-LE2 panel only |
🔴 Known Issues & Symptoms (This Dump Fixes)
The following symptoms on the HISENSE 24D33AU with T.SIS221.61 motherboard indicate corrupted or failed SPI flash memory that this firmware dump will resolve:
🔴 No Power On
TV shows no response when pressing the power button. Standby LED is completely off. No relay click sound.
🔴 No Backlight
Standby LED activates but the screen remains completely dark. No backlight illumination. Audio may or may not be present.
🔴 Blinking Standby LED
Standby indicator blinks in a repeating pattern and TV fails to start. Indicates firmware boot failure or CRC check error.
🔴 Boot Loop / Stuck on Logo
TV powers on, shows the Hisense logo, then restarts in an endless cycle. Main processor cannot load firmware from corrupted SPI.
🔴 No Display Output
Backlight works but no image on screen. OSD menu does not appear. TCON initialization data missing from SPI flash.
🔴 Corrupted EEPROM / SPI Data
Random malfunctions, frozen menus, incorrect settings, or partial boot. Data corruption in GD25Q64 flash sectors.
🔍 Diagnostic & Repair Protocol
Before flashing the firmware dump, perform the following diagnostic checks to confirm the issue is SPI memory-related:
Pre-Flash Diagnostic Checklist
- Power Supply Verification: Measure standby voltage (5V) and main voltage outputs (12V, 24V). Ensure all rails are within ±5% tolerance before suspecting firmware failure.
- Visual Inspection: Check for bulging or leaking capacitors, burnt components, or cold solder joints on the T.SIS221.61 board.
- Backlight Test: If no backlight, test LED strips independently with a constant current source to rule out hardware backlight failure.
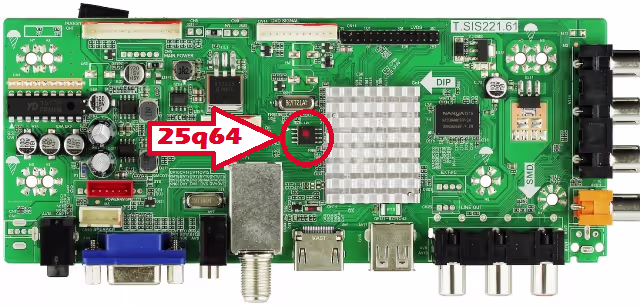
- SPI Chip Inspection: Look for physical damage, oxidation, or poor solder joints on the GD25Q64 chip.
- Read Existing Dump: Before erasing, always read and save the current SPI data as a backup, even if corrupted.
🛠️ Firmware Flash Procedure (RT809H)
Desolder the GD25Q64 SPI Chip
Power off and unplug the TV. Carefully desolder the GD25Q64 (SOP8 package) from the T.SIS221.61 motherboard using a hot air station at 320–350°C. Note pin 1 orientation before removal.
Connect Chip to RT809H Programmer
Place the desoldered GD25Q64 chip into an SOP8 to DIP8 adapter. Connect the adapter to the RT809H programmer. Ensure pin 1 alignment is correct.
Detect & Read Current Data
Open RT809H software. Click “Auto Detect” to identify the GD25Q64 chip. Read the current contents and save as a backup file before proceeding.
Erase the SPI Chip
Perform a full chip erase to clear all corrupted data. Verify the erase was successful by checking for blank state (all 0xFF).
Load & Write the Firmware Dump
Click “Open File” and load the downloaded T.SIS221.61 firmware dump (.bin). Click “Write” to flash the firmware to the GD25Q64 chip.
Verify Written Data
After writing, click “Verify” to compare the chip contents against the source file. Ensure zero errors before proceeding.
Resolder the Chip & Test
Resolder the programmed GD25Q64 back onto the T.SIS221.61 board. Verify solder quality under magnification. Reconnect all cables, panel flex, and power. Power on the HISENSE 24D33AU and confirm normal boot and operation.
🎬 Video Tutorial
Watch the complete step-by-step video guide for flashing the T.SIS221.61 firmware dump:
⬇️ Download Firmware Dump
T.SIS221.61 – HISENSE 24D33AU – GD25Q64 SPI Flash Dump
Click once to continue, then click again to download the file.