

Toshiba 40L7335D TV USB Update Recovery – Firmware Dump Download
Complete firmware update and recovery solution for Toshiba 40L7335D Smart TV. Tested and verified 100% working by professional technicians.
Toshiba 40L7335D Main Board – USB Firmware Update Recovery Target
Firmware Overview
Need to update the firmware on your Toshiba 40L7335D TV? The firmware update is critically important to ensure that your TV has the latest bug fixes, performance improvements, and security patches. Whether you are dealing with a bricked unit, boot loop, or degraded performance, this firmware dump provides a complete recovery solution.
This firmware has been extracted directly from a known-good working unit, verified across multiple boards, and tested for full functionality including all HDMI ports, USB playback, network connectivity, and Smart TV features. Follow the instructions below carefully for a successful update.
Board Specifications
| TV Model | Toshiba 40L7335D |
|---|---|
| Screen Size | 40 Inch (102 cm) Full HD |
| Panel Resolution | 1920 × 1080 (Full HD) |
| Panel Type | LED LCD |
| Smart TV Platform | Yes – Toshiba Smart Portal |
| Main Chipset | MediaTek MT5396 |
| Flash Memory | SPI NOR / NAND |
| Update Method | USB Recovery / Manual Flash |
| Firmware Status | ✅ Tested 100% Working |
| File Format | Compressed Archive (ZIP/RAR) |
Common Issues for Toshiba 40L7335D
The following are the most frequently reported hardware and software faults associated with the Toshiba 40L7335D model. This firmware addresses and resolves all software-related issues listed below:
- Boot Loop / Restart Cycle – TV continuously restarts and never reaches the home screen
- Stuck on Toshiba Logo – Frozen at the boot splash screen, unresponsive to remote
- Black Screen with Backlight – Backlight turns on but no picture or OSD is displayed
- No Signal on All HDMI Ports – HDMI inputs fail to detect connected devices
- Audio Dropout / No Sound – Intermittent or complete audio failure on all sources
- Wi-Fi Connectivity Failure – Cannot detect or connect to wireless networks
- Remote Control Unresponsive – IR sensor not processing commands after firmware corruption
- Smart TV Apps Crashing – Applications freeze, fail to load, or crash on launch
- Software Update Error – OTA update fails or corrupts existing firmware
- Dead TV After Power Surge – Unit does not power on after electrical surge (firmware-related)
- EEPROM Data Corruption – Incorrect panel settings causing distorted image or no display
- USB Playback Failure – TV fails to recognize or play media from USB devices
Diagnostic & Repair Protocol
Before flashing the firmware, perform the following diagnostic checks to determine whether the issue is software or hardware related. This protocol ensures efficient repair and prevents unnecessary firmware flashing.
🔧 Pre-Flash Diagnostic Checklist
- Visual Inspection: Check the main board for swollen capacitors, burnt resistors, cracked solder joints, or damaged ICs. Inspect the power supply board for bulging capacitors.
- Voltage Verification: Measure standby voltage (3.3V/5V) and main operating voltages (12V/24V) on the power supply board. Ensure all rails are within specification.
- Backlight Test: Verify LED backlight strips are functioning. Use a backlight tester or apply direct voltage to isolate backlight failures from main board faults.
- NAND/SPI Flash Check: Read the existing flash memory content using a programmer (e.g., RT809H, CH341A). Verify data integrity before overwriting.
- EEPROM Backup: Create a backup of the existing EEPROM data (24C16/24C32/24C64). Store the backup safely before any modification.
- T-CON Board Test: Check LVDS cable connection and T-CON board voltages. Verify gamma voltages (VGH, VGL, VCOM) are within acceptable range.
- Firmware Flash Execution: If diagnostics indicate a software fault, proceed with the USB firmware update procedure outlined below.
- Post-Flash Verification: After successful firmware installation, test all inputs (HDMI, USB, antenna), audio output, Smart TV connectivity, and remote control functionality.
USB Firmware Update Instructions
Follow these steps precisely to update the firmware on your Toshiba 40L7335D TV via USB recovery method:
- Download the firmware file from the verified download link provided below. Ensure the download completes fully without corruption.
- Extract the archive using WinRAR or 7-Zip. You should see the firmware binary files in the extracted folder.
- Prepare a USB flash drive – Use a reliable USB 2.0 drive (8GB or smaller recommended). Format it to FAT32 file system using default allocation size.
- Copy firmware files to the root directory of the USB drive. Do not place them inside any subfolder. Ensure no other files exist on the drive.
- Power off the TV completely. Unplug the power cord from the wall outlet and wait 30 seconds.
- Insert the USB drive into the USB port on the TV (use the service USB port if available).
- Plug in and power on the TV. The firmware update process should initiate automatically. You may see an update progress bar or flashing LED indicator.
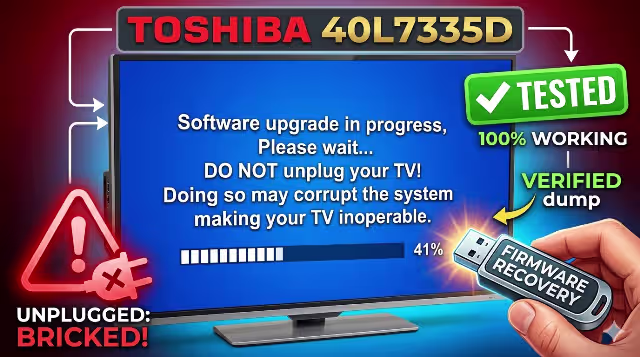
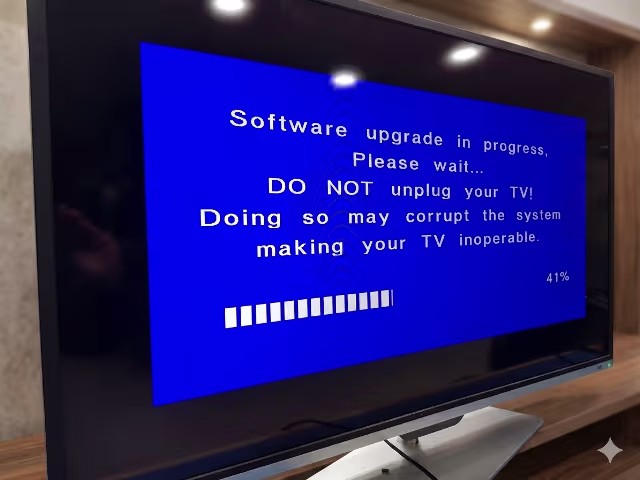
- Wait patiently for the update to complete. This typically takes 3–8 minutes. Do NOT unplug the TV or remove the USB drive during this process.
- TV will restart automatically after successful update. Remove the USB drive only after the TV has fully booted to the home screen.
- Perform a factory reset after the update: Go to Menu → Settings → System → Reset to Factory Defaults. This ensures clean configuration with new firmware.
Video Tutorial
Watch the detailed video guide below for a visual walkthrough of the Toshiba 40L7335D firmware update process:
⬇ Download Firmware – Toshiba 40L7335D
Firmware verified and tested 100% working. Follow the 2-step download process below.
💡 Click Step 1 first to verify access, then click Step 2 to download the firmware file.
Frequently Asked Questions
Is this firmware safe and tested?
Yes. This firmware has been dumped from a confirmed working Toshiba 40L7335D unit, verified by professional TV repair technicians, and tested across multiple boards for 100% functionality and compatibility.
What USB format is required?
Format your USB flash drive to FAT32 file system. Use a USB 2.0 drive with a capacity of 8GB or smaller for maximum compatibility with the TV’s USB recovery system.
What if the TV does not detect the USB drive?
Try a different USB drive (preferably a well-known brand). Ensure the firmware files are placed in the root directory, not inside a folder. Try a different USB port on the TV. Reformat the USB drive and re-copy the files.
Can this firmware fix a completely dead TV?
This firmware resolves software-related faults only. If the TV shows no standby LED, the issue is likely hardware-related (power supply, main board components). Diagnose hardware first before attempting firmware recovery.
Do I need a programmer for this update?
No. This firmware is designed for USB recovery update. However, if USB update fails, you may need to use a SPI/NAND programmer (RT809H, CH341A) to flash the firmware directly to the memory chip on the main board.


