DAIKO LED32R7298K USB Firmware (TP.SK506S.PB802)
Software corruption in modern LED TVs often results in frustrating operational failures. When your DAIKO LED32R7298K begins displaying severe boot or power issues, it is usually caused by corrupted data within the internal memory rather than a hardware component failure. This verified firmware download provides the essential replacement software necessary to restore your television’s functionality. This is a common requirement for TVs using the TP.SK506S.PB802 main board, similar to issues found in our popular general TV repair guides.
- Steady Red LED (TV remains in standby)
- Continuous rebooting loops
- Stuck on the initial boot logo screen
- No response to the remote or physical buttons
This technical download contains the verified firmware dump specifically matched to the TP.SK506S.PB802 combo board used in this 32-inch DAIKO model. By re-flashing the TV with this clean software file, you are essentially erasing the corrupted operating system and replacing it with a verified copy. This process should resolve the problematic behavior. Ensure you check for other related DAIKO TV models for alternative solutions if this specific software does not match your main board.
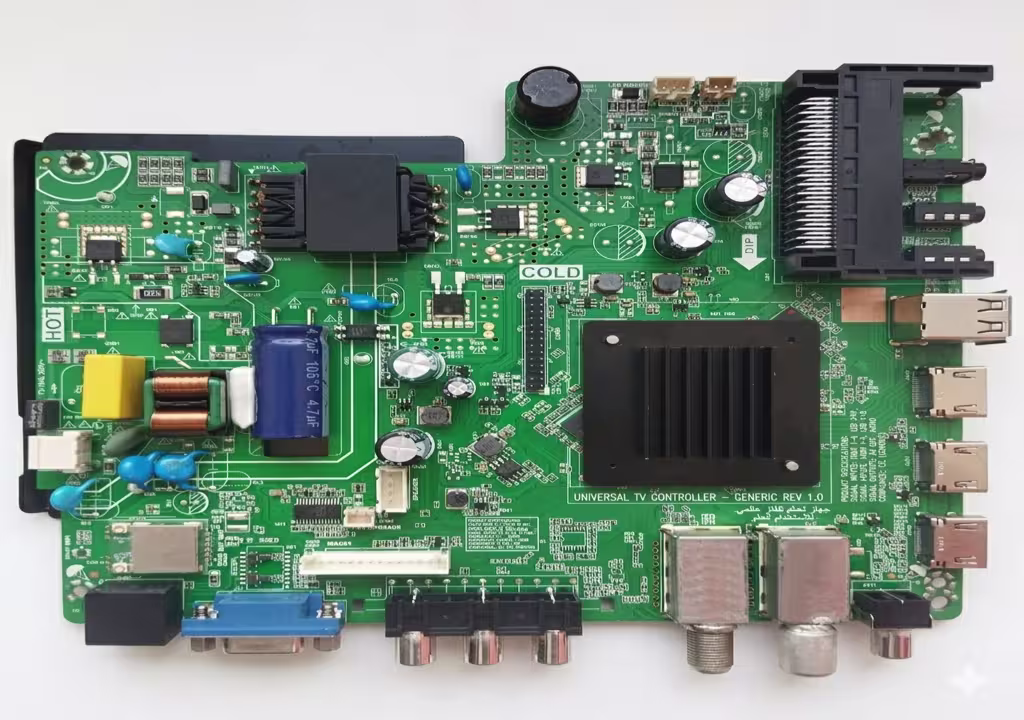
[Main Board: TP.SK506S.PB802 – Click to Zoom]
Technical Details
| Brand | DAIKO |
|---|---|
| Model | LED32R7298K |
| Main Board | TP.SK506S.PB802 |
| Panel | LQ315T3HC64 |
| Update Method | USB (FAT32) |
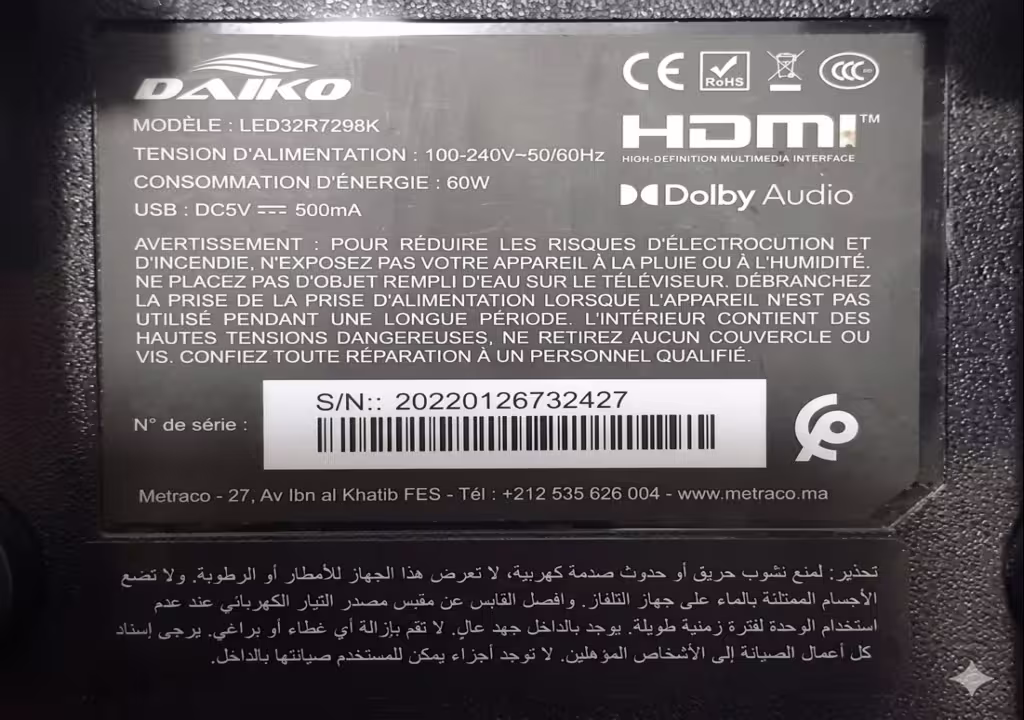
[Model Sticker Reference – Click to Zoom]
USB Upgrade Instructions
Related Repair Guide
Download Firmware Files
1st click opens verify link, 2nd click starts download.