

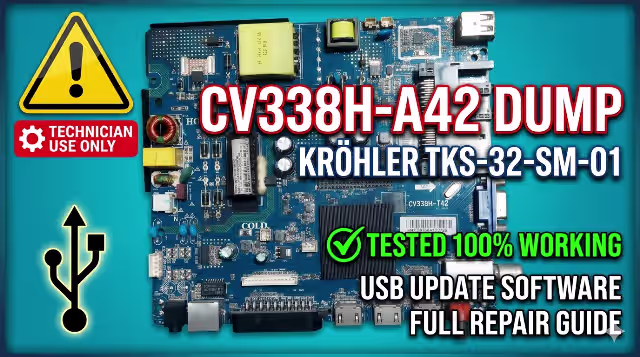
CV338H-A42 KRÖHLER TKS-32-SM-01 Firmware Dump – USB Software Update
This page provides a tested and verified firmware dump for the CV338H-A42 mainboard installed in the KRÖHLER TKS-32-SM-01 television. This firmware is intended exclusively for professional TV repair technicians who need to resolve software-related failures via USB update.
WARNING: This firmware is for professional technicians only. Incorrect flashing can permanently damage the mainboard. Proceed at your own risk.
Board & Model Specifications
| Parameter | Detail |
|---|---|
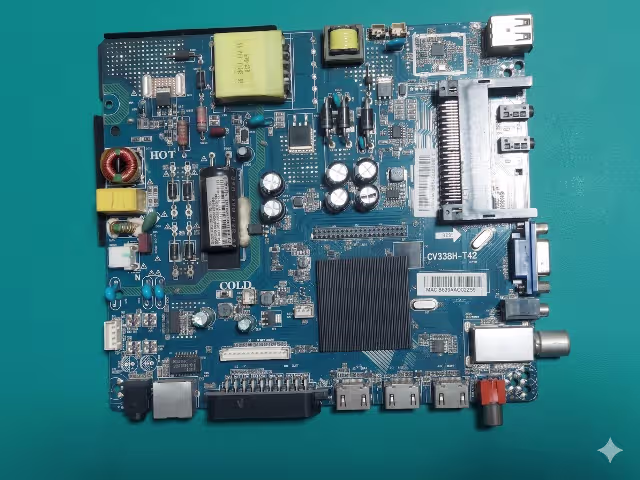
| Main Board | CV338H-A42 |
| Brand | KRÖHLER |
| Model Number | TKS-32-SM-01 |
| Screen Size | 32 Inch |
| Resolution | HD / Full HD |
| Update Method | USB Flash Drive |
| Firmware Status | Tested 100% Working ✔ |
Video Tutorial
Watch the complete firmware update walkthrough for the CV338H-A42 KRÖHLER TKS-32-SM-01:
USB Firmware Update – Step-by-Step Guide
Follow these steps carefully to update the firmware on your CV338H-A42 mainboard:
- Download the firmware file from the secure download link provided below in the download section.
- Copy the firmware file to a USB flash drive. Make sure that the file is placed in the root directory of the USB drive and not inside any folder. Use a FAT32-formatted USB drive (recommended 2GB–8GB).
- Insert the USB drive into the USB port on the CV338H-A42 mainboard.
- Turn on the TV and the mainboard. The update process will start automatically upon detecting the firmware file.
- Wait for the update process to complete. This may take 2–5 minutes depending on the firmware size. Do not turn off the TV or remove the USB drive during the update process.
- When the update is complete, the TV will automatically restart with the new firmware loaded.
- Remove the USB drive from the USB port on the mainboard after the TV has fully rebooted and is displaying a picture.
FIRMWARE TESTED – 100% WORKING ON CV338H-A42 KRÖHLER TKS-32-SM-01
Known Issues – CV338H-A42 KRÖHLER TKS-32-SM-01
Below are the most commonly reported issues for this mainboard and model that may be resolved through firmware update or require hardware-level repair:
| # | Issue | Possible Cause | Frequency |
|---|---|---|---|
| 1 | No power / Dead TV (standby LED off) | Power supply failure, blown fuse, shorted capacitors | Common |
| 2 | Standby light ON but no start-up | Corrupted firmware, faulty EMMC/SPI flash | Common |
| 3 | Backlight turns ON then OFF immediately | Defective LED strips, backlight driver IC failure | Common |
| 4 | Sound present but no picture (black screen) | T-CON board failure, LVDS cable issue, panel problem | Common |
| 5 | Stuck on logo / Boot loop | Corrupted firmware in EMMC, software crash | Common |
| 6 | No signal on all HDMI/AV inputs | Firmware glitch, HDMI IC failure | Moderate |
| 7 | Auto restart / Random shutdown | Overheating, capacitor failure, firmware bug | Common |
| 8 | Remote control not responding | IR receiver failure, firmware issue | Moderate |
| 9 | Wi-Fi / Network not connecting | Wi-Fi module failure, software corruption | Moderate |
| 10 | Distorted / No audio output | Audio amplifier IC failure, firmware bug | Rare |
| 11 | Horizontal or vertical lines on screen | Panel TAB bonding issue, T-CON failure | Moderate |
| 12 | USB ports not recognizing devices | Firmware corruption, USB controller damage | Rare |
Diagnostic & Repair Protocol
Before applying the firmware update, technicians should follow this diagnostic protocol to identify whether the issue is software or hardware related:
Phase 1 – Visual Inspection
- Inspect the mainboard for bulging or leaking capacitors, especially near the power regulation section.
- Check for burn marks, cracked solder joints, or damaged traces on the CV338H-A42 PCB.
- Verify all ribbon cables and connectors (LVDS, backlight, speaker) are properly seated.
- Inspect the power supply board for swollen capacitors or blown fuses.
Phase 2 – Voltage Measurement
- Measure standby voltage output: expected 5V STB.
- Measure main power rails: 12V, 5V, 3.3V, 1.8V on the mainboard.
- Verify backlight driver voltage output to LED strips.
- Check EMMC/SPI flash VCC supply: expected 3.3V or 1.8V.
Phase 3 – Software Recovery
- If the TV is stuck on logo, boot looping, or has corrupted settings, proceed with the USB firmware update using the file provided below.
- For dead EMMC scenarios, use a programmer tool (RT809H or similar) to flash the dump directly to the EMMC chip.
- After firmware update, perform a factory reset through the service menu if needed.
Phase 4 – Post-Update Verification
- Verify all HDMI, USB, and AV inputs are functional.
- Test audio output through internal speakers and headphone jack.
- Confirm remote control IR reception is working.
- Check channel tuning and picture quality settings.
- Monitor for stability over 30 minutes of continuous operation.
🔧 Required Tools for Hardware Repair
- Digital Multimeter (DMM)
- Soldering station with hot air rework
- EMMC/SPI Programmer (RT809H / RT809F)
- ESR Meter for capacitor testing
- USB flash drive (FAT32, 2GB–8GB)
- LVDS cable tester (optional)
⬇ Download Firmware File
CV338H-A42 – KRÖHLER TKS-32-SM-01 – Tested & Verified
Click once to continue, then click again to get the firmware file.
DISCLAIMER: This firmware is provided as-is for professional use. TVTech.online is not responsible for any damage resulting from incorrect installation. Always verify board model before flashing.


