D1515 Firmware Dump for Dahua DHI-HCVR5216AN-S3 DVR – Memory SPI Flash Repair Download
Download the D1515 firmware dump specifically extracted from the Dahua DHI-HCVR5216AN-S3 DVR. This SPI flash memory dump resolves critical boot failures, memory corruption, and firmware-related issues on the 41_087 D1515 80166673 main board. 100% tested and verified working by professional repair technicians.
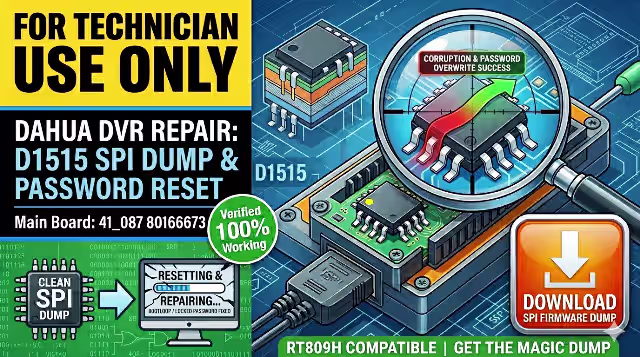
FOR TECHNICIAN USE ONLY. This firmware dump requires an SPI flash programmer (RT809H or equivalent) and intermediate-level soldering/desoldering skills. If you are not a qualified repair technician, do not attempt this procedure — incorrect flashing may permanently damage the DVR.
📋 Device Specifications
| Brand | Dahua |
| Model | DHI-HCVR5216AN-S3 |
| Device Type | Digital Video Recorder (DVR) — Penta-brid 720p |
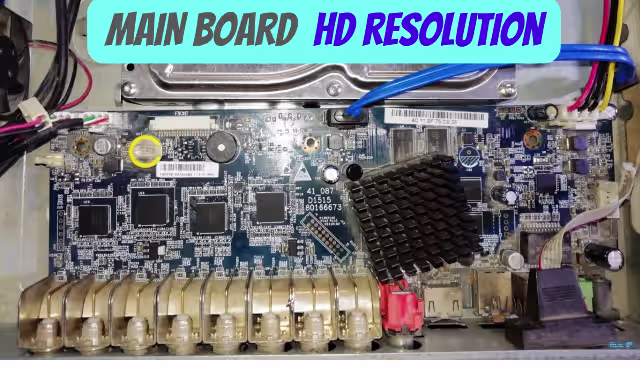
| Main Board | 41_087 D1515 80166673 |
| SPI Flash Chip | 25Q128 (128Mb / 16MB NOR Flash) |
| Programmer Used | RT809H (XGecu Universal Programmer) |
| Firmware Type | Full SPI Memory Dump (Bootloader + Firmware + Configuration) |
| Test Status | ✅ 100% Working — Verified on Multiple Units |
| File Format | Binary (.bin) — Raw flash dump |
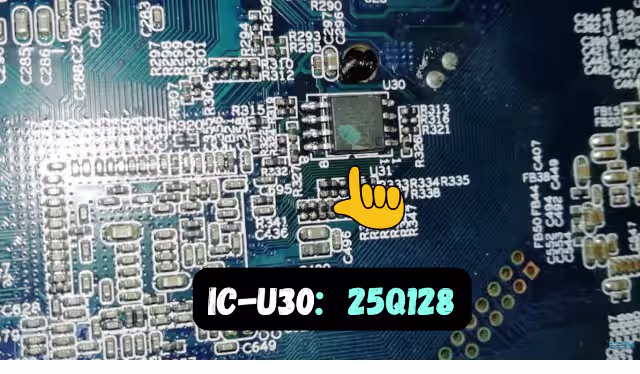
🖼️ SPI Flash Location on Board
⚠️ Common Issues Fixed by This Firmware Dump
If your Dahua DHI-HCVR5216AN-S3 exhibits any of the following symptoms, reflashing the SPI memory with this dump will likely resolve the problem:
Boot Loop / Stuck Logo — DVR continuously reboots or freezes at the Dahua logo
Black Screen / No Display — No video output on any channel (HDMI/VGA/CVBS)
Memory Corruption Error — “Memory error” or “System error” messages on boot
Firmware Crash After Surge — DVR dead after power surge or brownout
Factory Reset Failure — Unit fails to complete factory default restore
Corrupted Configuration — Settings lost or garbled after abnormal shutdown
🔬 Diagnostic & Repair Protocol
Follow this step-by-step procedure to successfully repair the Dahua DHI-HCVR5216AN-S3:
- Power off the DVR completely and disconnect all cables (BNC, HDMI, power, network).
- Open the chassis by removing the top cover screws. Ground yourself to prevent ESD damage.
- Locate the SPI Flash chip — the 25Q128 (SOIC-8 or SOP-8 package) on the main board labeled 41_087 D1515 80166673. Refer to the image above for exact position.
- Desolder the 25Q128 chip using hot air rework (350°C, medium airflow) or a fine-tip soldering iron with flux.
- Place the chip in the RT809H programmer using the appropriate SOP-8 adapter. Verify pin 1 orientation.
- Read and backup the existing flash contents first (even if corrupted) — this preserves any unique calibration data.
- Erase the chip completely using the RT809H software.
- Load and write the downloaded D1515 firmware dump .bin file to the 25Q128.
- Verify the written data against the source file (checksum verification).
- Resolder the chip back onto the main board. Inspect all pins under magnification for bridges or cold joints.
- Reassemble and test — the DVR should boot normally within 30–60 seconds.
Pro Tip: Always take a full backup of the original SPI chip before erasing. Some boards contain unique MAC addresses or serial numbers stored in the flash. Having the original dump allows you to compare and restore device-specific data if needed.
📥 Download D1515 Firmware Dump
D1515 Firmware Dump — SPI Flash 25Q128
Dahua DHI-HCVR5216AN-S3 | Main Board: 41_087 D1515 80166673
Step 1: Click to start download
🎥 Video Guide: Firmware Flashing Walkthrough
Watch the complete step-by-step video demonstration covering SPI chip removal, RT809H programming, and successful board recovery: