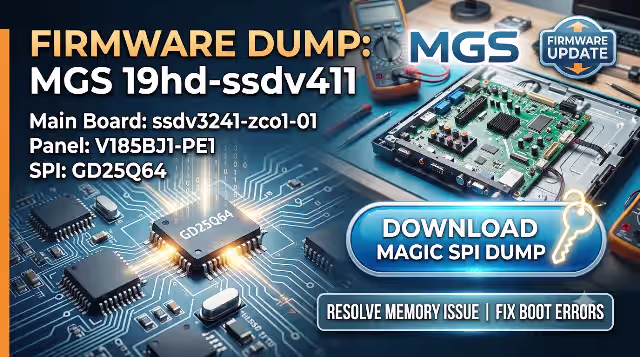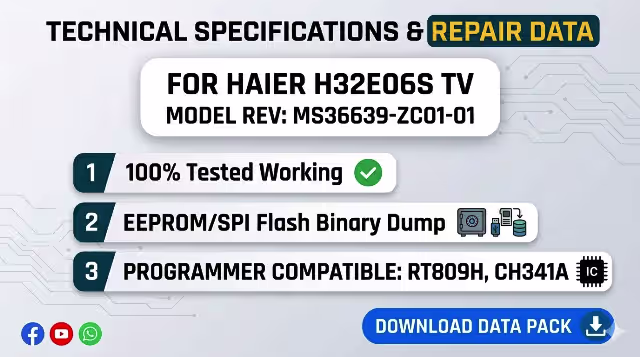
MS36639-ZC01-01 Firmware Dump – HAIER H32E06S
SPI Flash 25Q64 Memory Dump • Tested 100% Working • Instant Download
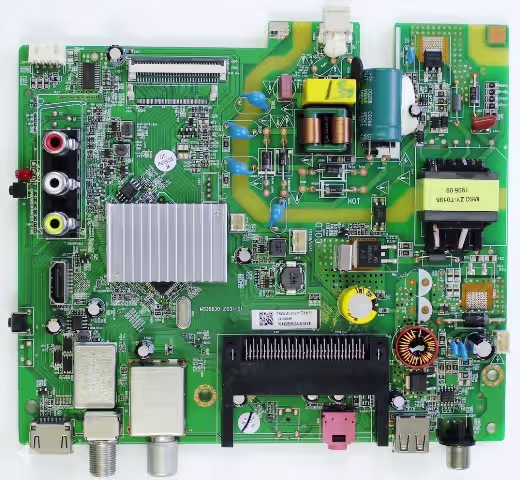 MS36639-ZC01-01
✓ 100% Tested
MS36639-ZC01-01
✓ 100% Tested
Firmware Overview
This page provides the MS36639-ZC01-01 firmware dump specifically extracted for the HAIER H32E06S television. This is a verified SPI memory dump from the 25Q64 flash chip, designed to resolve critical memory-related failures. The dump has been read, cleaned, and tested on actual hardware to ensure full functionality before distribution.
Whether your HAIER H32E06S is stuck on the logo screen, has a corrupted EEPROM, or refuses to boot entirely, this firmware dump serves as a factory-level restoration file that writes directly to the SPI flash memory via an RT809H programmer or USB update method.
Technical Specifications
| Brand | HAIER |
|---|---|
| Model | H32E06S |
| Main Board | MS36639-ZC01-01 |
| LCD Panel | HD Resolution (1366×768) |
| SPI Flash IC | 25Q64 (64Mbit / 8MB) |
| Programming Method | RT809H Programmer / USB Update |
| File Type | BIN (Full Dump) |
| Firmware Status | Tested & Working |
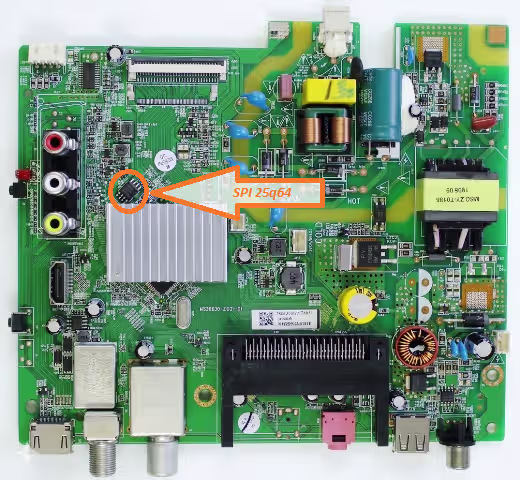
SPI Flash Chip Location
The 25Q64 SPI flash memory is located on the MS36639-ZC01-01 main board as shown in the image below. Before desoldering, take note of pin 1 orientation marked by the dot on the chip package. Use a hot air rework station at 320°C with adequate flux to prevent pad damage.
Common Issues & Symptoms
The following problems are frequently reported on the HAIER H32E06S with the MS36639-ZC01-01 board and are typically caused by SPI flash memory corruption:
- TV stuck on HAIER logo – boot loop with no progression to home screen
- No picture, no sound – backlight is ON but screen remains completely black
- Dead TV – no standby LED, no power response despite good power supply
- Software error after failed OTA firmware update (bricked state)
- EEPROM corruption – distorted picture, wrong color mapping, or inverted display
- Channel data and settings reset continuously after every power cycle
- Remote control becomes unresponsive – IR commands not processed by MCU
- Audio present but no video output on any input source (HDMI/AV/USB)
- TV powers on then immediately shuts off after 2-3 seconds (protection mode)
Diagnostic & Repair Protocol
Follow this systematic procedure to diagnose and repair the HAIER H32E06S using the firmware dump file. Each step should be performed in sequence to ensure successful restoration.
Phase 1 – Initial Hardware Inspection
- Visual Board Inspection: Remove the TV back cover and examine the MS36639-ZC01-01 main board for burnt components, swollen capacitors, cracked solder joints, or corrosion. Address any physical damage before proceeding with firmware work.
- Power Supply Verification: Using a multimeter, verify all output voltages from the PSU: 5V standby, 12V main, and 24V backlight supply. Ensure voltages are within ±5% tolerance under load conditions.
- SPI Chip Continuity Test: Verify the 25Q64 chip VCC (pin 8) receives 3.3V and GND (pin 4) has proper continuity. Check for short circuits between data lines (MOSI, MISO, CLK, CS).
Phase 2 – Firmware Programming (RT809H Method)
- Desolder the SPI Chip: Apply flux generously around the 25Q64 IC. Use a hot air station at 320°C with medium airflow. Carefully lift the chip once all pins are reflowed. Clean pads with solder wick.
- Seat Chip in Programmer: Place the 25Q64 into the SOP8 adapter on the RT809H programmer. Ensure pin 1 alignment matches the adapter marking. Close the clamp securely.
- Detect & Erase: Launch RT809H software, click “Auto Detect” to identify the W25Q64 chip. Perform a full chip erase and verify the erase was successful (all FF bytes).
- Load & Write Firmware: Open the downloaded BIN file via “Load File.” Click “Program” to write the firmware dump to the chip. Wait for the progress bar to complete – do not interrupt.
- Verify Data Integrity: Click “Verify” to compare the chip contents against the source file. A successful verification confirms 100% data match with zero errors.
- Resolder & Reassemble: Resolder the programmed 25Q64 chip back onto the main board with proper pin 1 orientation. Apply flux, use soldering iron at 350°C, and inspect all joints under magnification.
Phase 3 – USB Update Method (Alternative)
- Prepare USB Drive: Format a USB flash drive (4GB–16GB) to FAT32 file system. Copy the firmware file to the root directory of the USB drive.
- Enter Recovery Mode: Insert the USB drive into the TV’s USB port. Power on the TV while holding the menu button on the main board. The TV should detect the firmware file automatically.
- Flash Process: Follow on-screen prompts if display is functional. The update process takes approximately 3-5 minutes. Do not remove power during the update.
Phase 4 – Post-Flash Verification
- Initial Power Test: Connect the TV to mains power. The standby LED should illuminate within 2 seconds. Press power – the TV should boot to the initial setup wizard.
- Factory Reset: Navigate to Menu → System → Factory Reset. This clears any residual EEPROM data and ensures clean calibration values are loaded.
- Full Function Test: Test all inputs (HDMI, AV, USB, Antenna), audio output (internal speakers and headphone jack), remote control response, and on-screen menu navigation.
Video Tutorial
Watch the complete step-by-step firmware flashing process for the MS36639-ZC01-01 main board in the video guide below:
Download Firmware Dump
MS36639-ZC01-01 – SPI 25Q64 Dump File
HAIER H32E06S • BIN Format • Verified Working
Click the button above to start the download process