[100% Tested] QPWBXF455WJZZ Firmware Dump: Instantly Fix SHARP LC-40LE810E Boot Loop
This post provides the complete, 100% tested firmware dump for the SHARP LC-40LE810E television, specifically for the main board model QPWBXF455WJZZ. If your TV is stuck on the SHARP logo, caught in a reboot loop, or showing other software-related malfunctions, reprogramming the NAND and EEPROM ICs is a proven repair solution.
Firmware and Board Details
| Main Board | QPWBXF455WJZZ |
| TV Model | SHARP LC-40LE810E |
| Panel / Matrix | LK400D3LWF2Y |
| NAND Flash | K9F1208U0C (Position: ic8401) |
| EEPROM (SPI Flash) |
24C01 (Position: ic501)24C02 (Position: ic2004)24C64 (Position: ic8455)
|
| Programmer Method | RT809H (or compatible) |
| Firmware Status | ✓ 100% Tested and Working |
Common Symptoms of Firmware Failure
If your SHARP LC-40LE810E is experiencing the following issues, a firmware re-flash is highly likely to be the solution:
- 📺 TV is stuck on the SHARP startup logo
- 🔄 Device continuously reboots every few minutes (boot loop)
- 🔴 Red standby light is blinking, but the TV does not turn on
- 📉 No picture, but the backlight is on
- ❌ Smart TV features are unavailable or cause the TV to crash
Diagnostic & Repair Protocol
Follow these steps carefully to reprogram your TV’s main board.
-
Step 1: Safety First
Disconnect the TV from all power sources. Use an anti-static wrist strap to prevent electrostatic discharge (ESD) damage to the main board and its components.
-
Step 2: Disassemble TV
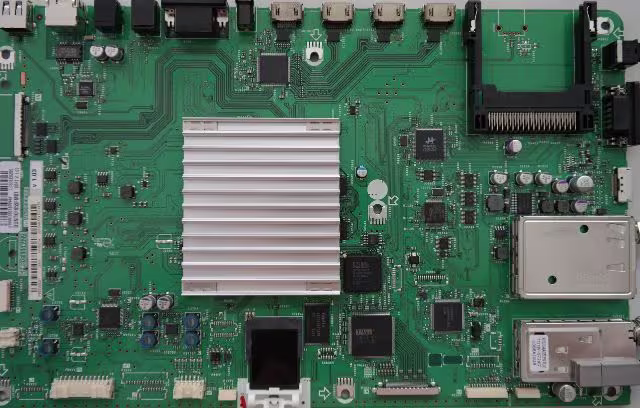
Carefully remove the back cover of the SHARP TV to gain access to the main board, which is identifiable by the model number QPWBXF455WJZZ.
-
Step 3: Locate ICs
Identify the target ICs on the board. The main NAND flash is
K9F1208U0Cat positionic8401. The smaller EEPROM chips are at positionsic501,ic2004, andic8455.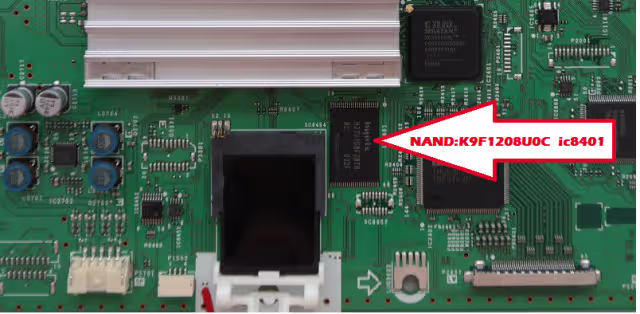
Location index for the K9F1208U0C NAND chip -
Step 4: Connect RT809H Programmer
Using your RT809H programmer, connect to the ICs. Depending on the adapter you have, you might use an ISP (In-System Programming) connection or need to carefully de-solder the chips for direct programming.
-
Step 5: Backup Original Firmware
⚠️ CRITICAL: Before erasing anything, read and save a full backup of the existing data from each chip. This is your only safety net if something goes wrong.
-
Step 6: Erase and Program
Use the RT809H software to erase the ICs. Then, load the new firmware files from the downloaded package and write them to the corresponding chips.
-
Step 7: Verify Data
After the writing process is complete, use the ‘Verify’ function in your programmer’s software. This confirms that the data on the chip matches the source file, ensuring a successful flash.
-
Step 8: Reassemble and Test
If you de-soldered the chips, carefully re-solder them back onto the board. Reassemble the TV, connect the power, and perform a full power-on test. The TV should now boot correctly.
Video Repair Guide
This video demonstrates a similar NAND programming process which can be helpful as a visual aid for the technique.
📥 Download Firmware QPWBXF455WJZZ
The download button will appear below when ready.