
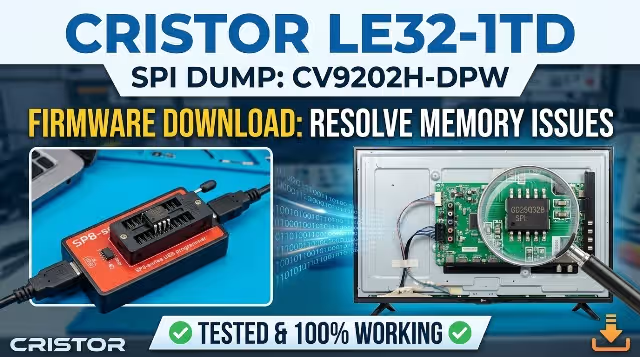
CV9202H-DPW Firmware Dump – CRISTOR LE32-1TD SPI Flash Download
 Tested 100%
About This Firmware
This page provides a verified and tested firmware dump for the CV9202H-DPW main board used in the CRISTOR LE32-1TD LED television. The SPI flash file targets the GD25Q32B memory chip and has been extracted, cleaned, and validated to resolve critical memory-related failures. This resource is intended exclusively for qualified TV repair technicians who have experience with SPI programmer tools and soldering work.
Whether you are dealing with a dead set after a power surge, a unit stuck on the boot logo, or corrupted EEPROM data causing OSD malfunctions, this firmware dump is engineered to restore full operational functionality to the television.
Technical Specifications
| Brand | CRISTOR |
| Model | LE32-1TD |
| Main Board | CV9202H-DPW |
| Panel | TC315B601 |
| SPI Flash IC | GD25Q32B (32Mbit / 4MB) |
| Programmer | SP8-A / SP8 Universal |
| File Format | .bin (binary dump) |
| Status | Tested & 100% Working |
Main Board Reference
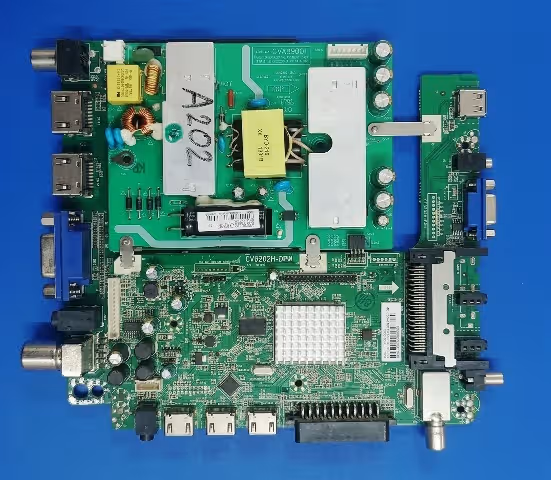
Below is a high-resolution photograph of the CV9202H-DPW main board. Click the image to zoom and inspect component placement, SPI chip location, and connector layout for accurate identification before beginning your repair procedure.
SPI Flash Memory – GD25Q32B
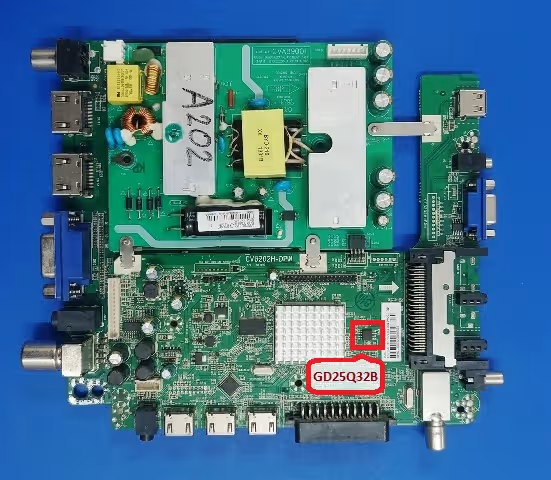
The GD25Q32B SPI flash memory IC stores the entire firmware, including bootloader, main application, channel data, and EEPROM parameters. This is the target chip for programming. Locate it on the main board using the reference image below.
Known Issues – CRISTOR LE32-1TD
The following symptoms have been documented on the CRISTOR LE32-1TD equipped with the CV9202H-DPW board. All of these issues are directly linked to corrupted or failed SPI flash memory data and are resolved by flashing a clean firmware dump.
- Dead TV, no response: The television shows no sign of life after a power surge or lightning strike. Power LED does not illuminate. Main board capacitors test good, but SPI firmware is corrupted beyond boot capability.
- Stuck on boot logo: The CRISTOR logo appears on screen but the TV never progresses to the home screen or input source. This indicates a corrupted main application partition within the flash memory.
- Black screen with backlight ON: Backlight LEDs illuminate but no image or OSD is displayed. Sound may or may not be present. Caused by partial firmware corruption in the display initialization routines.
- Restart loop (auto reboot): The TV powers on, shows logo briefly, then shuts off and restarts in an endless cycle. Bootloader detects invalid checksums and continuously attempts recovery.
- EEPROM data corruption: User settings cannot be saved, volume resets to default on each power cycle, or channel list is lost after every shutdown. Internal EEPROM region of SPI flash is damaged.
- OSD menu freeze or garbled display: On-screen display menus appear distorted, freeze when navigating, or show corrupted characters. Font and UI data within the firmware image is compromised.
- No signal on all inputs: TV boots successfully but shows “No Signal” on every HDMI, AV, and USB input regardless of connected devices. Input routing table in firmware is corrupted.
- Audio present but no picture: Sound plays normally from TV speakers, but the screen remains completely dark. Panel initialization data or T-CON communication parameters within the firmware are invalid.
Diagnostic & Repair Protocol
Follow this professional repair workflow to diagnose and resolve firmware-related failures on the CRISTOR LE32-1TD. Each step must be completed in sequence for a successful repair outcome.
Phase 1: Initial Diagnosis
- Visual inspection: Open the TV back cover and examine the CV9202H-DPW main board for visible damage including burnt components, swollen capacitors, cracked solder joints, or discolored areas around the power regulation section.
- Power rail verification: Using a multimeter, measure all primary voltage rails on the main board. Confirm 5V, 3.3V, 1.8V, and 12V supplies are within acceptable tolerance (plus or minus 5%). If any rail is missing, resolve the power issue before proceeding to firmware work.
- SPI chip identification: Locate the GD25Q32B SPI flash IC on the board. Verify the chip marking matches GD25Q32B or equivalent 25Q32 series. Note the pin 1 orientation dot for correct reinsertion after programming.
Phase 2: Firmware Programming
- Desolder the SPI chip: Using a hot air rework station set to 350-380 degrees Celsius with moderate airflow, carefully remove the GD25Q32B chip. Apply flux generously around the pins to ensure clean removal. Do not overheat surrounding components.
- Backup original data: Place the desoldered chip into the SP8 programmer with the appropriate SOP8 adapter. Read the existing chip contents and save the backup file. Even if corrupted, this backup may contain recoverable channel list or calibration data.
- Erase the chip completely: Perform a full chip erase operation through the SP8 software to clear all existing data and prepare the memory for clean programming.
- Write the firmware dump: Load the downloaded CV9202H-DPW firmware .bin file into the SP8 programmer software. Select the correct chip model (GD25Q32B). Execute the write operation and wait for completion without interruption.
- Verify the write operation: After writing, perform a verify operation to compare the chip contents against the source firmware file. The verification must show zero errors before proceeding.
Phase 3: Reassembly & Testing
- Resolder the SPI chip: Apply fresh solder paste to the PCB pads. Place the GD25Q32B chip with correct pin 1 orientation and reflow using the hot air station. Inspect all solder joints under magnification to ensure no bridges or cold joints exist.
- Reconnect all cables: Reattach the LVDS cable to the panel, the backlight LED connector, speaker wires, IR sensor, and power supply connector. Double-check all ribbon cable locks are properly seated.
- Power-on test: Connect the TV to mains power and switch on. The TV should boot past the logo screen within 5 to 10 seconds and display the initial setup wizard, indicating a successful firmware flash.
- Full functionality test: Navigate through all OSD menus, test every input source (HDMI, AV, USB), verify audio output, confirm channel scanning works, and ensure settings persist after a power cycle. Run the TV for a minimum of 30 minutes under load to confirm thermal stability.
Video Tutorial
Watch the complete firmware flashing demonstration for the CV9202H-DPW main board below. This video covers chip removal, programming with the SP8, and final testing on the CRISTOR LE32-1TD.
Download Firmware Dump
CV9202H-DPW SPI firmware dump for CRISTOR LE32-1TD – GD25Q32B flash file
Click once to proceed, then click again to download the file directly.